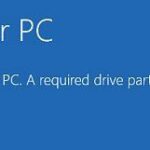
- It occurs when the hard drive is not detected, which prevents the computer from booting.
- To solve this problem effectively, Techquack gathers some methods and presents them in this post.
- The most common cause of this particular error is a poorly connected hard drive.
- Download and install the software.
- It will scan your computer to find problems.
- The tool will then correct the issues that were discovered.
In order to ensure everything runs as smoothly as possible, we recommend a few things before upgrading Ignition.
Fixed disks do not display is an error message that appears in Diskpart. It indicates that something is wrong with your computer’s hard drive. This error can even prevent your computer from booting successfully. To solve this problem effectively, Techquack gathers some methods and presents them in this post.
Diskpart List Disk Not Showing Ssd
A command line option is also available: type “diskpart > list disk > select disk n (n is the new SSD’s number) > attributes disk clear readonly> online disk > convert mbr” (or convert gpt) and hit Enter to start up the SSD drive.
Diskpart Does Not See Hard Drive
Choose Properties from the menu of the hard drive under Disk Drives.
An important classification is most likely a sign of a configuration problem, at the very least, it indicates a host that won’t boot. Having a server that won’t boot is enough to send a sysadmin’s pulse racing and adrenaline levels soaring.
Using disk parts in Windows 10 or Windows 8/8.1 can result in an error message called “No disk”. This means the hard drive cannot be detected, preventing the computer from booting.
On a Dell Latitude 7320, I am having a problem performing a disk clean. I am booting from a USB drive with win10 and using diskpart to clean the disks.
What is the reason for the “Hard drive not showing up” error on DiskPart?

The hard drive is not properly connected: it turns out that one of the most common causes of this particular error is a poorly connected hard drive. In most cases, this happens when the SATA or ATI data cable is not fully connected or is faulty. In this case, you can solve the problem by opening the laptop or PC case and booting the PC without the hard drive before reconnecting it.
Missing VMware driver: If this problem occurs after a NAT failure while using a VMware virtual machine, it is probably a direct result of a kernel panic. In this case, you will have to rely on recovery mode to get everything back up and running in order to restore your Windows installation. To do this, you’ll need to run a series of CMDs on the extended command line.
Damaged BCD data: Several affected users have confirmed that this problem can also occur due to corrupted system files in the boot configuration data. In this case, you can solve the problem by opening the extended command line and restoring the corrupted BCD files with a series of commands.
A fixed disk has been confirmed. Yep, there it is. Everything looks to be connected correctly, DIPs look good.
Initialization Error: An initialization error may also be the root cause of this particular error message. If this scenario applies, the best solution for end users would be to use the automatic repair utility. However, implementing this fix requires compatible Windows installation support.
To fix the “Disks Not Displayed” error on DiskPart, follow these steps
Updated: April 2024
We highly recommend that you use this tool for your error. Furthermore, this tool detects and removes common computer errors, protects you from loss of files, malware, and hardware failures, and optimizes your device for maximum performance. This software will help you fix your PC problems and prevent others from happening again:
- Step 1 : Install PC Repair & Optimizer Tool (Windows 10, 8, 7, XP, Vista).
- Step 2 : Click Start Scan to find out what issues are causing PC problems.
- Step 3 : Click on Repair All to correct all issues.


Check to see if the hard disk drive is badly connected.
- You should check the hard drive connectors in your computer if you recently made hardware changes.
- Disconnect all power sources from your computer and turn it off.
- The hard drive should be removed from the computer.
- You must restart your computer to ensure that the system recognizes you do not have a hard drive connected.
- It is important to turn off the computer and connect the hard drive if you receive an error message.
- The connection should be correct.
- If nothing has improved, restart the computer.
Rebuild the MBR
- You will need a Windows computer that is working. If you don’t have one, ask a friend if they have one.
- Hard drive partitioning tools can be downloaded from the Internet.
- The USB flash drive must contain enough space to contain the partitioning tool, so insert it into the computer and make sure it is connected to the computer.
- Create bootable media can be created by clicking Create bootable media in the left pane of the AOMEI Partition Wizard.
- Click Next.
- Make sure that your USB flash drive is selected after selecting the “USB Bootable Device” option.
- Click Continue.
- To confirm, click Yes.
- Disconnect the USB flash drive after the boot disk has been created.
Rebuild MBR
- The error occurred on the computer that is connected to the bootable USB flash drive.
- The computer should be rebooted.
- The bootable disk included in the kit must be used to boot. If necessary, the BIOS should be set up to boot from the bootable disk.
- Start the AOMEI Partition Wizard from its main interface and boot from it.
- Make sure the Rebuild MBR option is selected when you right-click on the system disk (where Windows is installed).
- Set the MBR type and operating system version in the Rebuild MBR window by clicking the drop-down menus.
- Continue by clicking OK.
- The operation will be completed when you click Apply and Continue.
- The USB flash drive should be disconnected and the computer should be restarted after the process is complete.
Check to see if the boot configuration data is corrupted
- Using the Windows installation media or a bootable USB drive, boot the computer.
- The Restore Computer option can be found on the Setup screen.
- To enable Command Prompt, click Advanced options.
- The following command should be entered at the command prompt window and executed:
Scanos/bootrec
RECONFIGURE/FIXMBR
Bootrec and FixBoot
Performing a boot recovery or rebuilding the boot sector - Follow the order of the commands.
- You should restart your computer once you have completed running a command from the command line.
Start Windows boot recovery
- Please see step 2 – method 1 if you do not have an installation DVD or Windows flash drive.
- In the boot selection screen, press any key to select a CD or DVD.
- Click Restore Computer at the bottom left of the Setup screen.
- After selecting Troubleshooting – Advanced Options, click OK.
- Click on Auto Repair.
- Continue by selecting an operating system.
- A system scan by Windows checks to see if there are any problems with the system or if any system files need to be repaired.
- If you haven’t noticed any improvement, you might want to restart your computer.
RECOMMENATION: Click here for help with Windows errors.
Frequently Asked Questions
Flash drive How do I determine which drive is part of the drive?
- Open a command prompt: Start -> Run -> cmd.
- Run the DISKPART utility: C: UserAdministrators -> diskpart.
- Select the disk you want to display (in the example disk 1 is used, it can be any valid disk number): DISKPART -> Select Disk 1.
- Display the details of the selected disk: Disk Details.
How do I repair DISKPART?
- Check the hardware connections.
- Change the data transfer mode of the device.
- Update or reinstall the device driver.
- Run CHKDSK to repair bad sectors on the disk.
- Repair the MBR.
How to list the drives when prompted?
At the prompt, type the disk partition and press Enter. The Diskpart prompt will open. When prompted, enter a listed disk and press Enter. The disk list appears in text format.
How do I know if a partition is active?
Another way is to go to your desktop, right-click on Computer or This PC, and choose Manage. Then Manage Disks, as shown above, will appear in the left-hand menu. Right-click on the primary partition you want to mark as active and select Mark Partition as Active.

Mark Ginter is a tech blogger with a passion for all things gadgets and gizmos. A self-proclaimed "geek", Mark has been blogging about technology for over 15 years. His blog, techquack.com, covers a wide range of topics including new product releases, industry news, and tips and tricks for getting the most out of your devices. If you're looking for someone who can keep you up-to-date with all the latest tech news and developments, then be sure to follow him over at Microsoft.