- In Windows 10, the Auto Repair feature is a handy feature that looks for and fixes common problems that can prevent your device from booting properly.
- If the computer fails to boot twice in a row, the auto-reboot mechanism kicks in on the third boot.
- If you prefer to fix boot problems manually, you can disable this feature in Windows 10.
Automatic Repair Couldn’t Repair Your Pc
It is a built-in feature of Windows that fixes boot-related problems automatically when they occur during startup. When it fails to work, the error “Automatic Repair loop” pops up, causing your computer to reboot repeatedly. Consequently, your computer will fail to boot and you will be unable to access all your computer’s programs, services, and files.
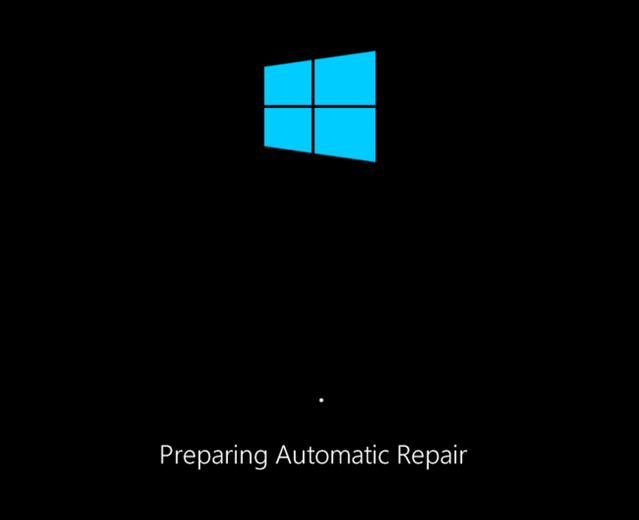
Hp Preparing Automatic Repair
Whenever you encounter the Preparing Automatic Repair screen loop, you should restart the computer. Press the power button three times to force the restart of your computer when it shows the HP preparing automatic repair screen. After the restart, the system will perform another automatic repair.
As of January 2021, Ashley S. Miller is a Customer Service Specialist. SummaryWindows 10 includes the ability to fix errors that may occur when users use their computers. You could benefit from the following methods in order to fix the system if it fails and even gets stuck.
Windows 10’s Auto Repair feature detects and fixes common booting problems and fixes them when they arise.
Preparing Automatic Repair Windows 10
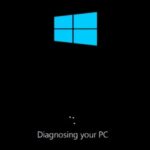
With Windows 10, you can troubleshoot issues preventing your computer from booting correctly with the help of Automatic Repair. The automatic repair function will be triggered if the computer fails to boot two consecutive times. In many cases, users have been stuck in the “Preparing Automatic Repair” boot loop after installing the latest Windows updates.
An auto-reboot mechanism kicks in if the computer fails to boot twice in a row. This process identifies and resolves commonly occurring boot problems by running a series of diagnostic tests.
Windows 10 Automatic Repair Loop
It is recommended that you perform a hard reboot when you encounter errors such as the automatic repair loop in Windows 10. The hard reset is performed by pressing the power button until the computer completely shuts down. Once the device is completely shut down, remove all peripherals and restart it.
Fixing Windows 10’s Automatic Repair loop can be done in a few different ways:
Windows 10 allows you to disable automatically recovering from boot problems if you prefer to fix them manually or if auto-recovery creates unexpected cycles.
In this Windows 10 guide by Techquack, we’ll walk you through how to disable automatic device diagnostics and repairs. If the auto repair was previously disabled or if you want to undo the changes, we’ll also describe the steps to re-enable the feature.
What causes the Windows 10 auto-repair cycle

It is unlikely that Windows 10’s auto-recovery cycle can be caused by any single factor, but it can be triggered by several situations. In order for Windows to start (or to recover), it must run the important files it needs. A missing or corrupted system file is a common cause of Windows not starting.
You will not be able to use the PC if the Windows kernel (ntoskrnl.exe) or other important services aren’t fully loaded. A recently installed component or connected device that doesn’t have a driver (or just doesn’t work properly) can also cause a repair stub.
Windows Fixing
A logical error can be fixed or a physical error can be marked as unreadable with this command.
A new video card or other high-end component requires Windows device drivers in order to operate correctly. If you do not have the drivers for your new components, a repair loop can occur.
In addition to these possible causes, there are other problems that can cause the Windows 10 auto repair loop, such as faulty components, malware infections, corrupted registry entries, or even corrupted installation files.
How do I fix the Windows 10 auto repair loop
We highly recommend that you use this tool for your error. Furthermore, this tool detects and removes common computer errors, protects you from loss of files, malware, and hardware failures, and optimizes your device for maximum performance. This software will help you fix your PC problems and prevent others from happening again:
Updated: April 2024


Use a disk utility
Click Next to proceed, select your language settings, and plug in your Windows installation media or system restore/restore disk.
- Restore your computer by clicking on the Restore button in the bottom pane.
- You can set your error by selecting Troubleshooting – Advanced Options – Set.
- In the command prompt, type chkdsk /f /r C:.
- Hit enter to exit.
- To check whether the problem has been resolved, restart your computer.
Restore boot and restore BCD using the command line
- Follow method 1 by opening a command line.
- Using the command line, type exe /rebuildbcd.
- By typing exe /fixmbr, you will be able to fix your mbr.
- Click on the Enter key and type exe /fixboot.
- After a successful command has been typed, press Enter.
- Using the following method, you can work around the automatic Windows restore cycle that still occurs on your computer.
Restore Windows Registry
- You can open a command prompt by selecting Troubleshooting – > Advanced Options – > Command Prompt from the Windows Startup Options menu.
- Press the Enter key at the command prompt. Type the following command and choose the correct drive letter: cd C:windowssystem32logfilessrt.
- Open Notepad by typing text.
- Press CTRL + O.
- You will need to navigate to C:WindowsSystem32 under File Type.
- Select “Run as administrator” from the right-click menu when you are on CMD.
- Press Enter to navigate to C:windowssystem32config.
- The Default, Software, SAM, System, and Security files should be renamed to .bak in order to back them up.
- In sequence, enter the following commands:
- DEFAULT.bak should be renamed to DEFAULT.bak; SAM.bak should be renamed to SAM.bak
- The SECURITY.bak file should be renamed to SECURITY.bak
- You need to rename SYSTEM SOFTWARE SOFTWARE.bak to SYSTEM SOFTWARE SOFTWARE.
- The SYSTEM.bak file should be renamed to SYSTEM.bak
- Press Enter to copy the file c:windowssystem32configRegBack to c:windowssystem32config.
- Your computer needs to be rebooted.
Delete the problem file
- Once again, enter these commands on the command line:
- You can find the log files in the folder C:WindowsSystem32LogFilesSrt.
- SrtTrail.txt.
- Thereafter, you’ll see a message saying “mel.sys is corrupt in c:windowssystem32drivers”.
- The solution file can now be edited with the following command.
- Go to C:WindowsSystem32Drivers
- Delvstock.sys.
- You may also try these troubleshooting steps if none of the above solutions help you.
Disable auto-repair at startup
- The command prompt should display a prompt where you can type bcdedit /set [default] recoveryenabled No.
- Windows 10 should now be accessible again after rebooting your computer. The automatic restore should now be disabled.
- Press CMD and enter bcdedit /set [default] recovery enabled Yes if it needs to be reset.
RECOMMENATION: Click here for help with Windows errors.
Frequently Asked Questions
How do I fix the automatic repair loop in Windows 10?
- At the command line, type bcdedit /set {default} recoveryenabled No and press Enter.
- Reboot your computer, automatic repair should be disabled at startup, and you should be able to access Windows 10 again.
- If you need to enable it again, you can type CMD bcdedit /set {default} recovery enabled Yes and press Enter.
How do I get out of the Prepare Auto Repair loop?
- From the Start menu, select Troubleshooting -> Advanced -> Command Prompt.
- Now run from the command line:
- This will disable boot recovery.
What is the cause of Windows 10 auto repair cycle?
The main cause of the Windows 10 auto repair cycle problem may be corrupt or faulty Windows 10 ISO files. More specifically, other factors such as defective hard drives, missing registry keys, or even complex malicious rootkits can also cause the problem.
How do I get automatic repair in Windows 10?
Accessing the Windows 10 Advanced Startup Options menu On many laptops, pressing the F11 key after powering on accesses the Windows 10 Advanced Startup Options menu. If you boot from the installation disk and click Next, Restore, the second option is available.

Mark Ginter is a tech blogger with a passion for all things gadgets and gizmos. A self-proclaimed "geek", Mark has been blogging about technology for over 15 years. His blog, techquack.com, covers a wide range of topics including new product releases, industry news, and tips and tricks for getting the most out of your devices. If you're looking for someone who can keep you up-to-date with all the latest tech news and developments, then be sure to follow him over at Microsoft.