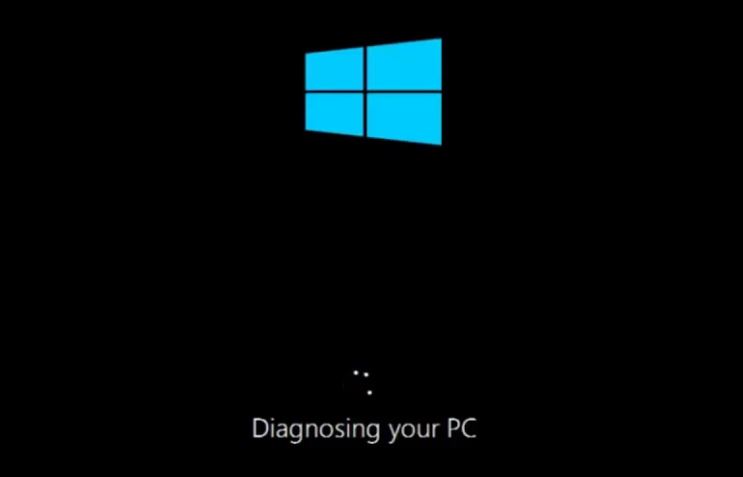
- The “Prepare for auto repair” or “PC Diagnostics” error message in Windows is blocked at startup.
- This article will show you several solutions to fix the ‘Prepare Auto Repair’ error message.
- It turns out that several scenarios cause the computer to hang on the “Diagnose Your PC” screen.
- If data is lost due to these messages, use the Techquack guide to find a solution.
- Download and install the software.
- It will scan your computer to find problems.
- The tool will then correct the issues that were discovered.
Why Does My Computer Keep Saying Preparing Automatic Repair
Windows’ Preparing Automatic Repair loop occurs when the boot files on your computer are corrupted or missing. The error can turn up on your screen either in blue or black.
The laptop is blocked on “Prepare Auto Repair” at startup? This article will show you several solutions to fix the “Prepare for auto repair” or “PC Diagnostics” error message in Windows. If data is lost due to these messages, use the Techquack guide.
Preparing Automatic Repair How Long To Wait
In Windows 10, you can use automatic repair to fix problems when you cannot boot up. Automatic Repair is triggered when the computer fails to boot twice in a row. It is a system response to rectify the booting issue if it occurs twice in a row. There have been many reports of users being stuck in a boot loop after installing the latest Windows updates.
It’s easy to troubleshoot issues that prevent you from booting correctly with Windows 10’s automatic repair feature. In order to resolve the booting issue, the system will automatically start the computer if it fails to boot properly for two consecutive times.
Windows 10 has a number of features that help optimize its performance on a particular computer. When the operating system encounters an error, it has the ability to provide the user with appropriate resources to resolve the problem or simply fix the problem itself. Sometimes the user is not notified and the problem is bypassed or resolved in the background. One of these functions is the diagnostic car repair function, which runs when the PC starts up. At these times, you will see a message – diagnose your PC or prepare for automatic repair. This feature has proven to be effective, but some users have reported that the repair process is blocked.
What’s the root cause of “diagnose your computer”?

An IT professional must understand why and how a computer is stuck in an infinite reboot loop.
A variety of user reports and repair strategies recommended by affected users were reviewed to investigate the issue. The computer hangs on the “Diagnose Your PC” screen in a number of situations. Here are some of the most likely causes:
Insufficient system memory – It turns out that this particular problem can also occur when the system does not have enough memory to load all the processes and services needed for the boot process. In this case, you can solve the problem by running your computer in safe mode and making room for the process to run smoothly.
Additionally, it is possible that this problem is caused by corrupted System Files. You cannot go beyond the Diagnostics page if you have corrupted System Files, so you must run the scans before Booting. We have a guide on how to repair Windows 10 system files.
Damaged system files – Damaged system files can also cause the system diagnostic utility to appear every time the system boots up. It gets stuck in a loop if the tool is also prone to corruption. If this scenario applies, you can solve the problem by running repair utilities such as DISM and SFC, or restoring your Windows installation to a healthy state with System Restore.
Faulty Car Repair Utility – As reported by various users, this problem may also be due to unidentified problems with the system’s hard drive. In this case, the auto repair company tries to fix the problem every time it starts, but cannot identify the culprit. One way to avoid this problem is to bypass the auto-repair screen by disabling the utility from the extended CMD window.
Corrupted BCD data – In the most severe cases, this problem can also be caused by corrupted boot data that interfere with the boot process. In this case, you can update all components of the operating system, including the boot data, by performing a clean installation or repair.
In this article, you will find several troubleshooting guides for overcoming the “diagnose your PC” screen if you are currently seeking a repair strategy. Each of the following possible solutions has been proven to be effective by at least one interested user and has been proven to be effective by at least one interested user.
Ultimately, you should choose a solution that is effective for your particular situation after following the possible solutions in the order in which we ranked them.
Windows 10 stuck at “PC Diagnostics”
Updated: April 2024
We highly recommend that you use this tool for your error. Furthermore, this tool detects and removes common computer errors, protects you from loss of files, malware, and hardware failures, and optimizes your device for maximum performance. This software will help you fix your PC problems and prevent others from happening again:
- Step 1 : Install PC Repair & Optimizer Tool (Windows 10, 8, 7, XP, Vista).
- Step 2 : Click Start Scan to find out what issues are causing PC problems.
- Step 3 : Click on Repair All to correct all issues.


Perform a hard reboot
Windows can be hard rebooted if it fails to start because of the “Prepare for auto repair” or “Diagnose your PC” error.
- Batteries and adapters should be removed.
- The power button should be held down for 20 seconds. Be sure the computer is starting up normally after 20 seconds.
Try these solutions if this does not work.
Start in Safe Mode
To start your computer in safe mode, follow this method.
- Your computer should be turned off.
- Start your PC by booting from the Windows bootable installation disk.
- You can continue booting from the CD or DVD by pressing any key.
- Click Next to continue the Windows Setup process after you have selected your language option.
- You can continue by entering the Restore Computer key or pressing the button.
- Troubleshooting should be selected.
- You can choose advanced options by clicking it.
- The Startup Settings button can be found here.
- You will see a different screen after clicking Restart.
- You can boot into “safe mode with networking” by pressing F4 on your keyboard or 4 on your keyboard. (To search the Internet after booting into safe mode, press 5 or F5 on your keyboard).
Expanding the system partition
“Preparing for Auto Repair” or “Computer Diagnostics” will appear if your computer’s system partition is smaller than it should be. In order to resolve this issue, you can use a third-party program that can help you increase the size of your system partition.
Windows 10 Attempting Repairs
It is recommended to check your HDD or SSD to determine if it has failed or is failing. Also, make sure to check the RAM to ensure it is functioning correctly. A Preparing Automatic Repair error occurs when your computer has a failed or failing hard drive.
In order to verify that the issue has been resolved, restart your computer after enlarging the system partition.
Perform a boot repair
It is sometimes recommended to perform an initial repair in preparation for an automatic repair on a laptop that is stuck at startup.
- Start your computer by inserting the Windows startup disk.
- By clicking Next, you will be able to select your language settings.
- To restore your computer, click Restore.
- Choosing Troubleshooting – Advanced Settings – Restore Boot from the menu will bring up the option.
Restore BCD.
These steps can be followed by users who wish to re-create the boot record in Windows 10 if the boot files are missing or corrupt.
1) Boot the PC with the Windows installation disk containing the Prepare for Auto Repair or PC Diagnostics error message.
The installation disk can be used to boot your computer.
You must click Next once you have selected your language settings.
You can restore your computer by clicking Restore.
The Troubleshooting button will appear.
In order to place an order, click the Quick button.
(The following commands should be typed at the prompt and then pressed Enter.
bootrec /fixmbr
Rebuild the boot record / fix the boot
bootrec /scanos
Rebuild the boot record with bootrec/rebuildbcd
Hit enter after typing exit.
Your computer should be rebooted.
Disable auto-reboot in Windows 10 startup
To automatically fix problems at startup, Windows 10 uses the auto-rebuild feature. Although this feature is very useful for most users, it may not always solve startup issues, or may even be the reason for them. It may be possible to fix some startup issues with Windows 10 by disabling Auto Repair. Following is a description of the steps.
- Your PC will begin to boot from the Windows startup disk when you insert it.
- By clicking Next, you will be able to select your language settings.
- To restore your computer, click Restore.
- Troubleshooting can be found by clicking here.
- By clicking Advanced Options, you can customize your settings.
- To order, click Quick.
- In the prompt box, type bcdedit /set [current] recoveryenabled No.
- Enter exit.
RECOMMENATION: Click here for help with Windows errors.
Most Frequently Asked Questions
How can I fix Windows 10 Diagnostics on my computer
- Press the "Windows + C" key on your keyboard.
- Press Settings, Change PC Settings and then press General.
- Scroll down to Advanced Startup, click Restart Now.
- Click Troubleshooting, Advanced Settings, Startup Settings.
- Click Restart, select Safe Mode, and press Enter.
Why is it that my computer always says “diagnose PC”?
When Windows tries to boot everything during a startup sequence and fails, it automatically goes into diagnostic mode to find out which component has failed. However, in situations where it fails to free up the necessary memory, the PC stays in the diagnostic mode cycle.
What is the average time it takes to diagnose a PC
Diagnosing the PC after selecting boot recovery will take some time, depending on whether applications are open or not before recovery. If an external device was used to start the PC, it usually takes one to two hours, up to a maximum of three hours.
What can I do to go beyond diagnosing my computer’s problems?
- Press the "Windows + C" key on your keyboard.
- Press Settings, Change PC Settings and then press General.
- Scroll down to Advanced Startup and click Restart Now.
- Click Troubleshooting, Advanced Settings, Startup Settings.
- Click Restart, select Safe Mode, then press Enter.

Mark Ginter is a tech blogger with a passion for all things gadgets and gizmos. A self-proclaimed "geek", Mark has been blogging about technology for over 15 years. His blog, techquack.com, covers a wide range of topics including new product releases, industry news, and tips and tricks for getting the most out of your devices. If you're looking for someone who can keep you up-to-date with all the latest tech news and developments, then be sure to follow him over at Microsoft.