- When restoring a system in Windows, you may receive an error message that says, “System protection must be enabled on this drive” In this case, what do you need to do to solve this problem? Here are two useful ways that Techquack offers you, and the best way to restore your PC to its previous state.
- Download and install the software.
- It will scan your computer to find problems.
- The tool will then correct the issues that were discovered.
Windows 10 System Protection
You can use System Restore to undo unwanted changes to the system when your computer is corrupted. System Restore allows you to restore a computer to a previous state without losing personal data.
When restoring a system in Windows, you may receive an error message that says, “System protection must be enabled on this drive”. In this case, what do you need to do to solve this problem? Here are two useful ways that Techquack offers you, and the best way to restore your PC to its previous state without activating system protection.
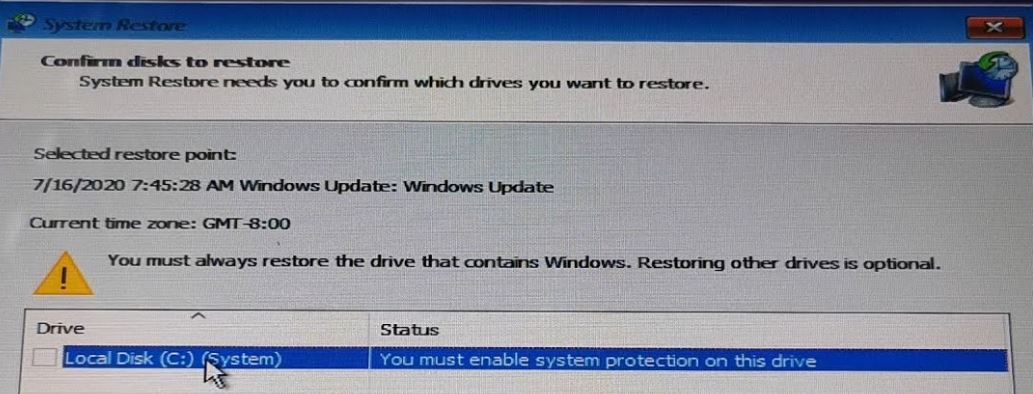
You Must Always Restore The Drive That Contains Windows
Disk space allocated to restore points is automatically managed by System Restore. As shown in the following table, System Restore allocates disk space according to the size of the computer’s hard disk and the version of Windows it runs. The earliest restore points are purged to make room for the newest ones. For system protection, you can adjust how much space per drive you need.
System Protection Windows 10
Most systems are set up to protect their boot drive by default, but leave other drives untouched.
Before performing any other system-related operations, such as updating Windows or editing the Windows registry, you can back up your system by creating a system restore point. With the help of the restore points you created when Windows encountered an error, you can restore your computer to its original state.
System Restore Windows 10 Command Prompt
You can open the advanced boot options screen by pressing F8 during the startup process.
To Use System Restore You Must
For all drives, System Restore does not automatically activate. Additionally, this is not a backup solution. You must enable the protection manually on each storage if you have other drives attached to your computer. Using it, you can undo changes to the system without affecting your documents.
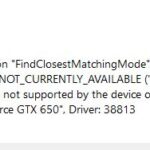
However, one user recently complained that he was experiencing slow performance after upgrading from Windows 7 to Windows 10. When he went to Troubleshooting and selected System Restore, he received an error message:
It is not necessary to restore any other disks when you restore the disk containing Windows.
This drive must be protected by the system.”
How To Enable System Protection Windows 10
By clicking Configure in the left menu, you can turn on system protection by clicking the Turn on system protection option. You can also modify disk space settings and delete existing restoration points from this dialog box. Click Apply and then OK to accept the changes.
A restore point must first be created and System Restore enabled before it can be used.
The Windows “System” drive is the only drive where you can turn on system protection.
Users report this problem on forums like Reddit on a regular basis, and it’s very common. You will still get the same message when restoring the C drive even if Windows indicates that you can restore multiple restore points if you are also experiencing this problem.
What is system protection?

Enable System Protection On The C: Drive Testout
Select Start, Control Panel, System and Security, System Protection, and System.
Turn On System Protection Windows 10
Under Windows, system protection can also be enabled.
Windows’ System Restore feature periodically creates and stores information about your computer’s system files and registry. Additionally, it backs up changes you make to files and makes copies of the backups so you can restore your system before important events occur.
NTFS drives can only be protected by system protection if they have a Windows operating system installed. System protection is enabled by default for a disk with a Windows operating system installed. If you encounter the above error, the function is disabled. Ensure that system protection is enabled before attempting a system restore.
What is the cause of the “System protection must be unlocked on this drive” error in Windows?

There are two reasons for this problem. When you access Extended Boot in order to restore your system, you may find that the system protection is simply not activated on your computer.
System Protection Is Turned Off
The next screen requires you to choose either the Turn off system protection or Disable system protection option for the hard drive you wish to disable protection for.
You may also need to reboot your computer if the system protection service is not working. It is important to look into both causes and possible solutions!
How to fix the “enable system protection” error?
Updated: April 2024
We highly recommend that you use this tool for your error. Furthermore, this tool detects and removes common computer errors, protects you from loss of files, malware, and hardware failures, and optimizes your device for maximum performance. This software will help you fix your PC problems and prevent others from happening again:
- Step 1 : Install PC Repair & Optimizer Tool (Windows 10, 8, 7, XP, Vista).
- Step 2 : Click Start Scan to find out what issues are causing PC problems.
- Step 3 : Click on Repair All to correct all issues.


Activate system protection through the command line
The order list has an option to activate system protection.
- Using the platform search tool and right-clicking on the command prompt, users can open the command prompt from Windows.
- Windows recovery environment can also be used if Windows doesn’t start.
- Select Diagnostics, Advanced Options, and Command Prompt in the Windows recovery environment.
- Press Enter after typing net start vss at the command prompt.
- Using the command prompt, type rstrui.exe /offline:C:windows=active followed by Enter.
- Laptops and desktops should be rebooted.
Rename the registry files
Renaming both registry files at the command line may fix the problem if the above solution fails.
- The first solution describes how to open the command line.
- Click on the prompt, and then type cd %systemroot%system32config.
- By pressing Enter, you will enter ren SYSTEM.001.
- Press Enter after entering ren SOFTWARE software.001.
Check the “Enable system protection” setting in Windows.
- Windows + X key combination can be used to check whether System Restore is enabled.
- The accessories will then be opened by pressing “Run.”.
- Click OK to open the window beneath the “Open from Run” field in which you type sysdm.cpl.
- The tab System Protection can be found by clicking here.
- Select Configure.
- If you do not have this setting enabled, select Enable system protection.
- When you click OK, the window will close when you select the Apply option.
Restart System Protection Service
If you encounter an activation error with system protection, restarting the system protection service can also help solve the problem.
- Click on the prompt to place an order.
- In the command prompt window, type net stop vss.
- Press Enter to restart the service by typing net start vss.
In order to restore system restore, you should follow these solutions.
It is also worth a try to reset the PC using the Windows recovery environment.
RECOMMENATION: Click here for help with Windows errors.
Frequently Asked Questions
How do I specify that system protection must be enabled for this drive?
- Enable system protection from the command line. Try enabling system protection from the command line.
- Rename the registry files.
- Check the "Enable System Protection" setting in Windows.
- Restart the System Protection service.
How do I enable system protection from the command line?
- Access the command line from additional options if you cannot access the Windows environment.
- Type this command: net start vss and press Enter.
- Enter this command: rstrui.exe /offline:C:windows=active and press Enter.
Do I need to enable system protection in Windows 10?
It is highly recommended that you leave system protection enabled for your Windows drive (e.g. C: ) so that you can quickly restore Windows 10 to an earlier restore point if needed. Restore points are not intended to replace system and image backups.
How do I enable system protection on the C drive?
Step 1: Right-click in the lower-left corner and open System on the access menu at DeepL.
Step 2: Select "System Protection" from the left.
Step 3: Select the hard disk drive and click Configure to continue.
Step 4: Select Enable System Protection and click OK.

Mark Ginter is a tech blogger with a passion for all things gadgets and gizmos. A self-proclaimed "geek", Mark has been blogging about technology for over 15 years. His blog, techquack.com, covers a wide range of topics including new product releases, industry news, and tips and tricks for getting the most out of your devices. If you're looking for someone who can keep you up-to-date with all the latest tech news and developments, then be sure to follow him over at Microsoft.