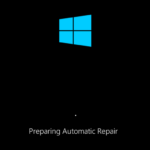
- If your Windows 10 computer isn’t starting properly, you can use Startup Repair to diagnose and fix problems.
- This tool will automatically scan your system for common problems and attempt to fix them.
- If Startup Repair is successful, you’ll see a message telling you so.
- You can then restart your computer and try booting normally.
- Make sure that your PC is up to date with the latest security updates and patches.
- Download and install the software.
- It will scan your computer to find problems.
- The tool will then correct the issues that were discovered.
A Required Device Isn’t Connected 0xc00000e
Your PC/Device needs to be repaired if it suddenly displays the following error message: Your PC/Device must be repaired. If a required device cannot be connected or accessed (0xc00000f), it may be because the BCD is missing, a system file has been corrupted or a cable has been damaged.
What’s weird is I can’t access the BIOS at all. It just comes up with an “A3” message in the bottom right corner with a black screen. No problem if the SSD is disconnected, but why wouldn’t it access the BIOS?
You can fix this error by using 3 easy methods. If you encounter this message, one of the error codes associated with it is usually 0xC000000e, 0xC000000f, 0xC0000001, 0xC0000225, 0xC0000185…
As in this case, when your computer suddenly displays a blue screen with the following error message: “Your computer/device needs repair. The required device is not connected or not available. Whatever the reason, after a few tries you will probably find that none of the suggestions in the bottom left corner work, and you also cannot start Windows to perform common actions. In this case, you can try the following troubleshooting methods or choose the latest remedy to restore your system and resolve any related issues.
What causes this type of error

6) Follow the instructions on the screen to continue booting from the Windows 10, 8 or 7 USB or DVD bootable media.
As a result of incorrect computer shutdowns (such as a power failure), this BSOD error may occur, and it can usually be caused by incorrect boot configuration data. In Windows operating systems, you may encounter a malfunctioning mirror drive if you use the Windows mirroring feature for fault tolerance.
While Windows System Restore may not be an ideal backup solution for Windows, it can be useful in some situations when you wish only to roll back a Windows Update or undo changes made by a misbehaving application. However, before using Windows System Restore you must ensure that the utility is active and configured correctly.
Accessing and configuring Windows System Restore is not a straightforward task, as the utility itself is somewhat hard to find. Therefore, we will examine how to use System Restore in Windows. Note: The process is very similar for System Restore in Windows 7, Windows 8 and Windows 10.
Several factors may contribute to this error:
- Hard drive damage.
- Configurations for booting that are invalid
- Computer shut down improperly.
How to repair the error
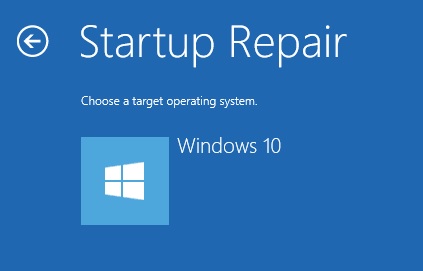
Initiate Startup Repair
Your Pc Device Needs To Be Repaired 0xc00000f
By using the Command Prompt, you can rebuild the BCD manually if you encounter the error “Your PC needs to be repaired 0xc000000f.”.
Here are the steps to use Startup Repair on Windows 10 if your computer isn’t able to start properly. This tool automatically scans your system for common problems and fixes them.
- The Advanced Startup Options menu can be accessed by pressing the F8 key during startup of Windows 10. To access it, you need to access your installation media. You can also click the “Restart” option on the Start menu while holding down the Shift key.
- The Troubleshoot option can be found under Advanced Startup Options.
- To start the startup repair process, click the “Startup Repair” button.
- If Startup Repair finds any problems, it will attempt to fix them.
- Upon completion of Startup Repair, you will see a message letting you know the process has been successful. You can then reboot your computer and try booting normally again.
Launch System Restore
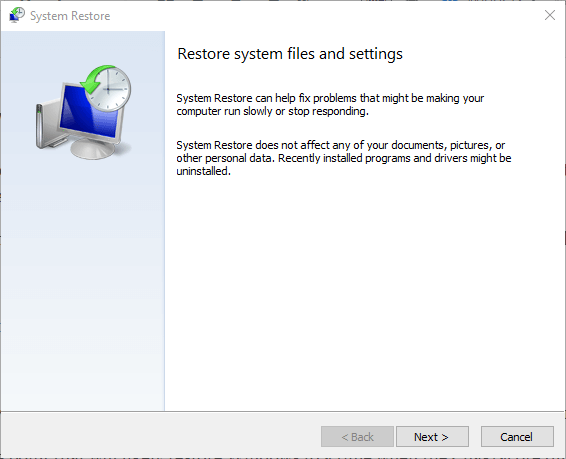
Restoring Windows 10 to an earlier version is as easy as following these steps:
- In the Start menu, type Control Panel into the search bar.
- Then, select Security and System.
- The “Restore system files and settings” link is found under the heading Backup and Restore.
- Next, select “Advanced Restore” from the menu.
- After choosing the restore point, click “Next” and choose the date that you would like to restore your computer to.
- The restoration process will be completed once you have followed the prompts. Once your system has been restarted, restart it.
The following steps will guide you through the process of restoring your computer to a previous date.
Updated: April 2024
We highly recommend that you use this tool for your error. Furthermore, this tool detects and removes common computer errors, protects you from loss of files, malware, and hardware failures, and optimizes your device for maximum performance. This software will help you fix your PC problems and prevent others from happening again:
- Step 1 : Install PC Repair & Optimizer Tool (Windows 10, 8, 7, XP, Vista).
- Step 2 : Click Start Scan to find out what issues are causing PC problems.
- Step 3 : Click on Repair All to correct all issues.

Run SFC scan
SFC scans on Windows 10 can be performed as follows:
- Choose Start > All Programs > Command Prompt.
- ‘Run as administrator’ can be selected by right-clicking on ‘Command Prompt’.
- Click the “Command Prompt” button and type ‘sfc /scannow’.
- If any corrupt files are found, a message will appear after the scanning process has been completed.
- It is important to reboot your computer after a scan, so that it can be confirmed that the issue has been resolved. If any corrupt files are found, they will be repaired automatically.
Make sure that your PC is up to date
In just a few minutes, you can update your Windows 10 computer. Here’s a step-by-step guide:
- Choosing Settings from the Start button will open a new window.
- Click Update & Security under Settings.
- You can check for updates by clicking the Check for updates button in the Update & Security window.
- A download and installation of any updates will take place automatically if they are available.
- The computer will be prompted to restart after the updates have been installed. Follow the restart instructions on the screen.
It’s easy to keep your Windows 10 computer secure and up-to-date by following these simple steps.
Scan your PC for malware
This guide explains how to run a Windows Defender scan on Windows 10 to make sure it is protected from spyware and malware.
- Navigate to the Settings tab by clicking on the Start button.
- To update and secure your device, click the Update & Security button in the Settings window.
- Open Windows Defender Security Center by clicking Windows Security in the Update & Security window.
- You can scan your computer by clicking the Scan option on the left side of the Windows Defender Security Center.
- Click the Scan Now button if you want to scan your computer for malware with any non-Windows Defender antivirus programs. If you have any, choose Windows Defender Antivirus.
- Take any necessary action after reviewing the results of the scan. Once quarantined files have been moved to a separate location on your computer, they cannot run or infect your computer until they are restored or deleted. A file can always be ignored if you’re unsure what to do about it at the moment. If any problems arise later, you can decide to ignore it.
RECOMMENATION: Click here for help with Windows errors.
Frequently Asked Questions
How do you fix a required device isn’t connected or can’t be accessed?
- Repair the BCD.
- Run Startup Repair.
- Check the BIOS settings.
- Perform a system restore.
- Run a hard disk check and a system file check.
- Set the desired partition as the active partition.
What are some reasons for 'a required device isnt connected or cant be accessed'?
- Damaged hard drive.
- Invalid boot configurations
- Improper shutdown of the Windows computer.
How to perform a System Restore?
- Open the Control Panel. You can do this by searching for it in the Start menu.
- Click on the option for System and Security.
- Click on the link that says "Restore system files and settings."
- Click on the button that says "Advanced Restore."
- Choose the date that you want to restore your computer to and then click "Next."
- Follow the prompts to complete the restoration process.
- Restart your system when prompted.

Mark Ginter is a tech blogger with a passion for all things gadgets and gizmos. A self-proclaimed "geek", Mark has been blogging about technology for over 15 years. His blog, techquack.com, covers a wide range of topics including new product releases, industry news, and tips and tricks for getting the most out of your devices. If you're looking for someone who can keep you up-to-date with all the latest tech news and developments, then be sure to follow him over at Microsoft.