- In this tutorial, we’ll go over the steps to fix the Minecraft `Failed to Write Core Dump’ error on Windows 10.
- In this guide, we will list the different solutions to this error.
- There is no universal solution for this error; different methods may work for different users.
- The problem is likely caused by a faulty or outdated video card driver that is not compatible with the version of Minecraft you’re using.
- Download and install the software.
- It will scan your computer to find problems.
- The tool will then correct the issues that were discovered.
Java Core Dump
This section explains how to generate and collect core dumps (also known as crash dumps). A core dump or a crash dump is a memory snapshot of a running process. A core dump can be automatically created by the operating system when a fatal or unhandled error (for example, signal or system exception) occurs. Alternatively, a core dump can be forced by means of system-provided command-line utilities. Sometimes a core dump is useful when diagnosing a process that appears to be hung; the core dump may reveal information about the cause of the hang.
Mojang Studios released Minecraft in November 2011, and it became a success soon after. Every month about ninety-one million players log into the game, which is the largest player count compared to other online games. It supports macOS, Windows, iOS, and Android devices along with Xbox and PlayStation. However, many gamers have reported the error: Failed to write core dump. Minidumps are not enabled by default on client versions of Windows. Read our guide to learn how to fix Minecraft Error Failed to Write Core Dump on Windows 10 PC. Moreover, this article will also help with how to enable Minidumps on Windows 10.
We’re going to show you how to fix a Minecraft error that says ‘Failed to Write Core Dump’ on Windows 10. This sandbox survival game is one of the best-selling video games ever. It has a 3D, procedurally generated world that allows you to do many things. The gameplay and features of the game are well known, but many of you don’t know how to deal with certain error situations.
As minidumps are not enabled by default on client versions of Windows, users are often frustrated when the game stops working. Luckily, this post provides solutions to remove Core Dump errors permanently.
There is a constant crash in minecraft on either joining servers or changing preferences.
Our goal in this guide is to offer you the different solutions to the Fail to Write Core Dump error in Minecraft. This error cannot be solved in a universal way. Each method may work for different players. See which solution works best for you by trying the ones listed below.
The Minecraft error message “Failed to Write Core Dump” on Windows 10 can be fixed with some tips and tricks today.
I have been having trouble using Minecraft for quite some time now. It just keeps giving me the same response. Mods won’t work, and any other version of Minecraft won’t work either. I’ve deleted and downloaded Minecraft, deleted and downloaded Minecraft, etc. Do you have any suggestions for how to fix it? (If you need further information, I might be able to send it to you.)
What is the cause of the Minecraft `Failed to Write Core Dump’ error?

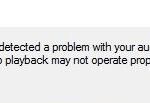
You may receive an error message about Minecraft because your video card is malfunctioning on the current version of Windows on your computer.
My problem is that minecraft does not start a world after I click the start button. I have tried fixing it myself, searching for solutions, and asking my university helpdesk for help. The description of the error message is as follows:
Your video card driver may be out of date or faulty if you’ve already updated Windows.
The reason for this error can be attributed to a variety of factors. Depending on your video card, it may be coming from Intel or Nvidia.
In order to fix the Failed to Write Core Dump Minecraft error on Windows 10, we will give all the instructions you need.
Fix the error `Failed to Write Core Dump’ in Minecraft
Updated: April 2024
We highly recommend that you use this tool for your error. Furthermore, this tool detects and removes common computer errors, protects you from loss of files, malware, and hardware failures, and optimizes your device for maximum performance. This software will help you fix your PC problems and prevent others from happening again:
- Step 1 : Install PC Repair & Optimizer Tool (Windows 10, 8, 7, XP, Vista).
- Step 2 : Click Start Scan to find out what issues are causing PC problems.
- Step 3 : Click on Repair All to correct all issues.


Update the latest Intel graphics card driver (if available).
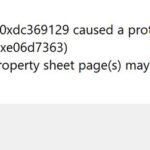
Intel graphics gas pedal drivers include the ig9icd64.dll file, which will most likely cause problems if you’re using an Intel integrated graphics card.
There was an error writing a minidump. Windows client versions do not enable minidump at the default level.”
The Intel Update Assistant can help you resolve this problem if you are experiencing this issue.
Minecraft servers can finally be joined and created by many affected users, who previously couldn’t do so.
Changing Intel graphics drivers is as simple as following these steps:
- You can get started by clicking “Get Started” on their website.
- Then, click the “Download All” button after the initial scan has completed. Once the download has completed, click the “Done” button.
- The driver installation process will begin once the download is complete. Simply double-click on each installation file to begin the process.
- Whenever you try to connect or create a Minecraft server after a successful update installation, see if the error “Failed to Write Core Dump” disappears.
Force Vsync and Triple Buffering in Minecraft (Nvidia only)
The “Failed to Write Core Dump” error will most likely appear on mid-to-high-end Nvidia GPU users because their video card settings don’t force them to use VSync.
It is also possible to force this option in the game settings, but it is easier to do so with the Nvidia Control Panel. This problem can be solved by adding Javaw.exe to the list of controls in the Java path.
The Nvidia Control Panel lets you enable dual-streaming and triple-buffering in the 3D settings menu for any program that uses Javaw.exe, including Minecraft. Here is a step-by-step guide on how to do it:
- You can display Nvidia Control Panel by right-clicking an empty space on your desktop and selecting it.
- The Manage 3D Settings menu item is located under the 3D settings section of the Nvidia Control Panel.
- You will need to select the Program Settings menu from the right-hand menu. After that, select Add -> Browse from the right-hand menu. This will allow you to navigate to the location where Java is installed, select javaw.exe from the Java installation directory, and click Open.
- The default settings should now be switched to ON for both Vertical Sync and Triple Buffering once the executable has loaded.
- Click Apply when you have applied both settings.
- See if the problem is resolved by joining or creating another Minecraft server.
Reinstall the AMD Catalyst utility (AMD only)
In Windows client versions, AMD software installation is partially corrupted, which causes the message “Failed to write core dump”.
This problem can be fixed by uninstalling AMD software and reinstalling the most recent version through AMD’s official channels.
The following steps will guide you through the process:
- To access the “Programs and Features” menu, click on the Windows + R key. Type “appwiz.CPL” and click on the Enter key.
- Locate the AMD installation you would like to remove from the list of installed applications by scrolling down the list. Right-click on the AMD installation and select Uninstall from the pop-up menu.
- The uninstall process will be completed after clicking Ok at the confirmation prompt.
- Your computer will start up again once you restart it.
- You can download AMD Catalyst from the manufacturer’s website. Once the download has been completed, run the executable installation file and follow the onscreen instructions.
- Try connecting to or creating a Minecraft server after installing the new version and restarting your system.
Try creating the dump file manually
The following steps will guide you through creating a dump file in Windows using Task Manager.
- You can use the Minecraft launcher or Minecraft to open the game.
- If you hold down Ctrl+Shift+Esc, you can open the Task Manager by right-clicking the taskbar.
- The Java(TM) Platform SE Binary can be found by right-clicking on Minecraft Launcher (if not, click Java(TM) Platform SE Binary).
- You can now create a dump file by clicking the “Create dump file” button.
- The selected process will be dumped by Windows.
If you want to try Minecraft again, restart your computer.
RECOMMENATION: Click here for help with Windows errors.
Frequently Asked Questions
How do I fix a failed kernel dump?
- Update the latest Intel graphics card driver (if applicable).
- Force Vsync and Triple Buffering on Minecraft (Nvidia only).
- Reinstall the AMD Catalyst utility (AMD only).
- Try to create a dump file manually.
How do I enable Java mini dump in Windows?
Enable minidump via Advanced System Settings > System Properties > Startup and Recovery > Settings > Write debugging information: `Small memory dump. You need to reboot your computer, then you will see more complete logs.
How to enable memory kernel dump in Windows?
- Right-click on My Computer, then on Properties.
- Click on the "Advanced" tab.
- Under "Startup and recovery," click "Settings."
- Under "Write debugging information" select "Small memory dump (64 KB)".
- The default directory is "CWindowsMinidump" for "Small dump directory:".
- Click the "OK" button.
How to enable mini dump in Windows 10?
- Now click on the "System and Security" button in the Control Panel.
- Then click on the "System" button in the list.
- Now click on the "Advanced System Settings" button.
- Under "Startup and Recovery", click on Settings.
- Finally, in the Debug drop-down menu, select the "Small memory dump" option, and then click the "OK" button.

Mark Ginter is a tech blogger with a passion for all things gadgets and gizmos. A self-proclaimed "geek", Mark has been blogging about technology for over 15 years. His blog, techquack.com, covers a wide range of topics including new product releases, industry news, and tips and tricks for getting the most out of your devices. If you're looking for someone who can keep you up-to-date with all the latest tech news and developments, then be sure to follow him over at Microsoft.