- Every time your Windows computer encounters an error, it displays a BSOD or blue screen of death.
- This screen usually appears for a split second, creates several logs or dump files, as many other people do, and then suddenly reboots the computer.
- These crash dump files are stored inside the computer and can only be viewed by the administrator.
- It turns out that various factors can contribute to this problem.
- The possible repairs listed below have been ranked by effectiveness and severity.
- Download and install the software.
- It will scan your computer to find problems.
- The tool will then correct the issues that were discovered.
There was an error during the dump file creation process in the most popular articles regarding dump file creation
Every time your Windows computer encounters an error, it displays a BSOD or blue screen of death. This screen usually appears for a split second, creates several logs or dump files, as many other people do, and then suddenly reboots the computer. However, this process happens so quickly that the user often has no way to determine the error code and therefore probably has no way to check what went wrong. These crash dump files are stored inside the computer and can only be viewed by the administrator.
Crash dumps in Windows 10 can be either one of four types:
- Memory dump in full,
- Storage in the kernel,
- 256KB or less.
- Active memory files should be dumped.
What is the reason for the “Dump file creation failed due to a dump creation error”?

The user reports we looked at as well as the fix strategies commonly used to resolve this particular problem pointed to a variety of factors that can lead to this error message. Here are a few possible culprits:
Cleaning application deletes dump file: It turns out that many third-party cleaning or system optimization applications delete or prevent the creation of a dump file to improve computer performance. If this scenario applies, the problem can be solved by removing the application that deletes the dump file.
Damage to system files: It turns out that damage to system files can also be the cause of this particular error message. The corruption may have reached certain dump dependencies, preventing the file from being created correctly. In this case, you should be able to solve the problem by resolving the corrupted items with utilities such as SFC and DISM. In more serious cases the only solution may be an on-site repair.
A corrupted system file can also cause this problem. Windows users can remedy this problem by running DISM and SFC scans. The steps are as follows:
Outdated / Unstable BIOS: Seriously outdated BIOS or some stability issues can also cause a dump file problem. In some cases, BSODs can also be caused by your BIOS firmware, not just a dump problem. If this scenario applies to your current situation, you may be able to resolve the problem by updating your BIOS to the latest version.
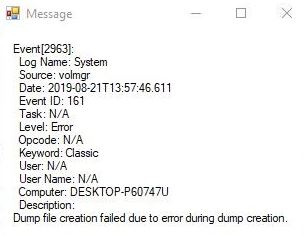
Several Windows users have reported being unable to access the dump files. They receive an error message that says “Dump file creation failed due to an error during dump creation” when they attempt to access the dump files. Follow these simple steps to fix this problem if you experience the same problem when you access the dump files on your device.
There are a variety of troubleshooting guides in this article if you are currently experiencing this error message and want to resolve your dump creation of your operating system. In the following section you will find a list of possible repair strategies that have been successfully utilized by other interested users to resolve these problems.
Listed below are the possible repairs ranked by effectiveness and severity, so we recommend that you follow them in order for best results. No matter what the cause of the error, you should find a solution to fix the “Create dump file failed due to an error in creating the dump file” error.
How to fix the “Dump file creation failed due to dump file creation error” error?
Updated: April 2024
We highly recommend that you use this tool for your error. Furthermore, this tool detects and removes common computer errors, protects you from loss of files, malware, and hardware failures, and optimizes your device for maximum performance. This software will help you fix your PC problems and prevent others from happening again:
- Step 1 : Install PC Repair & Optimizer Tool (Windows 10, 8, 7, XP, Vista).
- Step 2 : Click Start Scan to find out what issues are causing PC problems.
- Step 3 : Click on Repair All to correct all issues.


Uninstall the cleanup application
In this method, we will remove the cleanup application from your computer if you are using one to perform cleanup functions on your computer. In this application, the dump file is not created when the computer crash.
- Then, type “appwiz.cpl” into the prompt after pressing the “Windows + R” keys simultaneously.
- The “Programs and Features” window will open after you hit the “Enter” key.
- In the list, locate the Cleanup application, right-click it, and choose Uninstall.
- In addition to restarting the computer, check if the dump file creation was affected by the error.
Performing a DISM scan
In this solution, we will use the command line to perform a DISM scan. Hard drives often have corrupted or defective sectors, resulting in the “Create dump file failed” error.
- Your computer will launch a command prompt when you click the “Windows” key.
- Choose “Run as administrator” after right-clicking the command line in the results window.
- Then press Enter to execute the following command:
Cleanup-image / Scanhealth can be run using DISM.exe. - Then, copy, paste and press Enter again the following command after running the above command:
A DISM.exe command with a clean-up-image and a scan-health parameter can be run as follows: - Check if the problem has been resolved by closing the command.
Checking the disk
The computer uses this command to look for corrupted sectors on the hard drive and restore the operating system and other files.
- Type “Command Prompt” onto your computer’s keyboard using the Windows key.
- Select “Run as administrator” from the right-click menu of the command line found in the search results.
- Press Enter once you have typed C: into the drive name box.
- Using the Enter key, open the directory by typing “cd”.
- You can fix corrupted files automatically by typing the following commands:
ccdsk /f. - It was a problem with Volmgr 10 windows that was resolved by destroying the dump file.
Updating the BIOS and GPU firmware
Most problems occur when you use an outdated application on your PC. When a new version of software is released, support for previous versions is either blocked or limited. Therefore, an outdated BIOS may also be one of the causes of this error. Updating the BIOS can help solve this problem. Just open your browser and enter “Device name (Dell, HP, Lenovo, etc.) + Windows version (7, 8, 10) + Download the latest BIOS version”. After the boot is complete, update the BIOS and check if the error has been resolved. If the BIOS update did not fix the problem, update the GPU firmware using the same procedure.
Create Windows 10 support and reinstall Windows
Reinstalling Windows from scratch can be used as a last resort to eliminate any configuration errors your computer accumulated over time. This should automatically resolve your issue since the new installation will eliminate any errors.
- Here is a link to the Windows 10 Media Tool you need to download to make this fix.
Note: You must accept the license terms to complete the download. - You can now create installation media for another PC by selecting “Create installation media for another PC”.
- Plug a USB flash drive with at least 8 GB of free space into the computer and select your preferred language and architecture for Windows.
- You must install all the necessary drivers after you have successfully created the installation media.
- You can open the boot menu by pressing the F12 key while the computer is off and the USB flash drive is connected.
- You can now start the installation by selecting “Next” and choosing “Install Windows”.
Changing the registry from the command line
There have been cases where the “Dump file creation failed due to a dump creation error” error has been fixed by adding a simple registry entry. You should try this solution before moving on to another solution.
- Then press the Enter key after typing “Regedit” in the prompt.
- The following path should be entered in the registry editor.
- HKML_LOCAL_MACHINESystemCurrentControlSetCrashControl.
- Set “DisplayParameters” to “1” after creating a new word.
- Check if the error created when creating dump file 161 volmgr has been resolved by restarting your computer.
Changing RAM slots
Underclocked RAM can be caused by dust, foreign objects, or other causes. To fix this problem, open the desktop and clean out the RAM slots or replace them with new ones. This should speed up the BIOS.
Disable the automatic reboot option
The auto-reboot of your computer may prevent you from creating the dump file as a result of improper configuration. In order to create the dump file, we will disable the auto-run option.
- To open it, click “This PC”.
- Using your right-click menu, select “Properties.”.
- You will now be able to access the “System Properties” window by selecting “Advanced System Settings” in the left pane.
- You can change your startup and recovery settings under the “Advanced” tab.
- Click “OK” after unchecking “Auto Restart”.
- You can apply your changes by selecting “Apply”.
RECOMMENATION: Click here for help with Windows errors.
Frequently Asked Questions
How to create a backup dump file?
- Open regedit.exe.
- Open HKEY_LOCAL_MACHINESOFTWAREMicrosoftWindows Error ReportingLocalDumps key.
- Set DumpFolder (REG_EXPAND_SZ) to the directory where you want to create the dump.
- Optionally, you can prohibit WHO from storing many dumps by setting DumpCount (DWORD) to a low number.
How do I clear the Win dump files?
Select the "Start" button and type "Disk Cleanup" in the Windows search bar. Right-click on Disk Cleanup and select Run as Administrator. When you run Disk Cleanup as Administrator, it runs in advanced mode and can delete the dump file.
What happens when you create a dump file?
A dump file is a snapshot showing the current process and modules loaded from an application at a given time. Testers also create dumps to store data from programs that have failed or are not responding, for later use in testing. The Visual Studio debugger can store-dump files for managed or native code.
Is it possible to delete the crash dump files?
You can delete these .dmp files to free up disk space, which is a good idea because they can be very large - if your computer has a blue screen, you may have MEMORY. DMP file of 800 MB or more, taking up space on your system drive. Windows will help you remove these files automatically.

Mark Ginter is a tech blogger with a passion for all things gadgets and gizmos. A self-proclaimed "geek", Mark has been blogging about technology for over 15 years. His blog, techquack.com, covers a wide range of topics including new product releases, industry news, and tips and tricks for getting the most out of your devices. If you're looking for someone who can keep you up-to-date with all the latest tech news and developments, then be sure to follow him over at Microsoft.