- AMD Catalyst Control Center is free and available for all Windows operating systems starting with Windows 7 and above.
- It is available as part of the AMD Radon graphics card driver package or can be downloaded from the official AMD website.
- If you use a Radeon (or any other AMD graphics card), you will probably use the Catalyst control center.
- This problem is usually caused by incorrect, corrupt, or outdated video card drivers.
- To solve this problem, you will need to reinstall and update them.
- Download and install the software.
- It will scan your computer to find problems.
- The tool will then correct the issues that were discovered.
Amd Radeon Control Panel
In addition to supporting graphics cards and APUs from Advanced Micro Devices, AMD Radeon Software provides a graphical user interface for Windows 64-bit operating systems and Linux based distributions that utilize Electron.
You may already have AMD Catalyst Control Center installed on your computer if you have an AMD graphics card. You can use it to control the display settings, video performance, and profiles, among other things.
Amd Catalyst Install Manager
A freeware program developed by Advanced Micro Devices Inc. named AMD Catalyst Install Manager.
The application does not open as usual today when you try to use it. An error message appears instead: AMD Catalyst Control Center cannot be commissioned. At the moment, the AMD Catalyst Control Center cannot be used for configuring settings. You can solve this problem quickly and easily, but it’s not a big deal.
WHAT IS AN AMD CATALYST?

Amd Link Support Is Missing
Following the installation of Radeon Software version 19.11.2, AMD Link is missing.
With AMD CC, different drivers depend on different .NET versions, and newer drivers use “AMD Vision Engine Control Center” instead of “AMD Vision Engine Control Center.” @EraticFox Which video card and driver do you use? @CK Which drivers are you using? Did you first remove old drivers?
In order to solve this, I uninstalled everything via Control Panel – AMD Catalyst Install Manager. After doing so, I removed all AMD.
AMD Catalyst Control Center (CCC) is a software utility application and driver developed by AMD Technologies, a subsidiary of Advanced Micro Devices known for its PC processor chips. A driver and software utility application for the Radeon 8500 was launched in 2002.
How To Open Amd Radeon Settings
1. Use the right-click menu on the Radeon Settings icon in the system tray to open the AMD Radeon Settings interface.
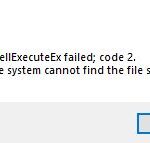
A problem with some packaged files was detected by AMD Software Installer, which terminated the installation process.
Hydravision, Multimedia Center, and other utilities were included in the first software application.
Amd Radeon Setting Download
Here are the steps to get AMD Software: Adrenalin Edition set up and installed:
In addition to Remote Wonder, AMD Catalyst software includes the Catalyst Control Center add-on, which quickly became one of the most popular add-ons. AMD Catalyst Control Center was renamed AMD Catalyst Control Center shortly after ATI acquired AMD. Besides serving as a main hub for all AMD graphics card related options and features, Catalyst Control Center is a software package for AMD graphics cards.
What causes AMD Catalyst Control Center issues on Windows?

Amd Radeon Software Not Opening
If your AMD software doesn’t open, it’s usually due to a corrupt, outdated, or buggy graphics driver. In most cases, upgrading your drivers will fix compatibility problems while overwriting faulty settings when you update them to the latest version. If you haven’t been updating your drivers regularly, you’ll face this issue.
For all operating systems starting with Windows 7 and above, AMD Catalyst Control Center is free. Radeon (or any other AMD graphics card) users are likely to use the Catalyst Control Center if they use a Radeon (or any other AMD graphics card). The Catalyst Control Center comes with the Radon graphics card driver package.
If you have followed the steps in Solution 1, you should already have the AMD drivers on your computer. This solution also requires the latest AMD drivers. If you do not, make sure you download them and keep the installation file. This method has been successful for a number of users, so make sure you follow the steps below.
It has been known that this software has some problems, such as the Catalyst Control Center not opening normally, as well as errors telling you the AMD Catalyst Control Center cannot be started. There are solutions to this problem, which can be caused by incorrect, corrupted, or outdated video card drivers. The solution for this problem is to reinstall and update the video card drivers. To solve this problem, please read the following guide.
How do I fix the AMD Catalyst Control Center in Windows?
Updated: April 2024
We highly recommend that you use this tool for your error. Furthermore, this tool detects and removes common computer errors, protects you from loss of files, malware, and hardware failures, and optimizes your device for maximum performance. This software will help you fix your PC problems and prevent others from happening again:
- Step 1 : Install PC Repair & Optimizer Tool (Windows 10, 8, 7, XP, Vista).
- Step 2 : Click Start Scan to find out what issues are causing PC problems.
- Step 3 : Click on Repair All to correct all issues.

Windows 10 or 11 won’t open or start AMD Catalyst Control Center for a variety of reasons. A missing or outdated driver or a faulty driver installation can cause your AMD Catalyst Control Center to crash. Whatever the reason, you can fix it by following these steps.

Reinstall the graphics driver
Users have been able to solve this problem by taking a number of measures. To solve the problem, try reinstalling the graphics drivers in safe mode. Additionally, if you wish to eliminate all traces of the driver, you must use a tool that will completely remove all traces of the driver.
- Open the Device Manager by clicking on the Device Manager icon in the Start menu or by typing “devmgmt.msc” in the Run dialog box and clicking “OK”.
- Click on the AMD graphics card in the “Display Adapters” section and select “Remove Device” from the menu that appears when you right-click it.
- Whenever a dialog box asks for confirmation of your choice, confirm your selection.
- You can now launch the installer by clicking on the display uninstaller in the downloads list. Follow the instructions.
- The System Configuration window should now appear after pressing Windows + R. Type “msconfig” in the “Open” text box, then click OK.
- Then click on the “Boot” tab and select the “Secure Boot” option with the “Minimum” radio button selected.
- You will now see your video card automatically detected in the “Graphics Driver Selection” section. Click on it to start the display uninstaller in safe mode.
- Open System Configuration again and uncheck the box next to Secure Boot. After the process is completed, click Clear and Restart (highly recommended).
- You can find the latest graphics card drivers by going to AMD’s support website after restarting your computer. Click on the submit button once you’ve found them.
- Next, select the operating system you wish to remove the driver from, click the “+” button next to it, and click the download button.
- You will need to run the installation file once it has been downloaded from the “Downloads” folder. Please disable your internet connection during the installation. If you experience any problems, please let us know!
Note: Some users have indicated that they were able to solve the problem the same way. However, they had to run the installation file for the new driver in Windows 7 compatibility mode. To try this too, follow these steps!
- Select the file you want to change and right-click on it to open the pop-up menu. Choose Properties from the menu.
- To run this program in compatibility mode, check the Compatibility Mode section in the properties window, and then check the box next to “Run this program in compatibility mode”.
Before clicking the “OK” button, make sure Windows 7 is selected.
If you have followed these steps successfully, you should still have AMD directory management center on your computer!
Remove a specific policy
AMD drivers are required for this solution as well.
This method has worked for many users, so you should follow these steps if you haven’t already. If you haven’t, download them and save them to your computer.
You should start by removing AMD software from your control panel.
Windows 10 :
- Alternatively, you can open Settings by pressing the Windows key + I shortcut, or by clicking on the Start menu button, then clicking on the gear icon in the bottom left corner.
- Click on the application menu, then open the applications list. You should immediately see the AMD entry in that list, so click left-click and select Uninstall. Follow the steps.
Windows versions other than the above:
- Alternatively, you can click the Windows + R key combination and type “control.exe” in the box. Click the OK button once you have selected the result.
- Choose “Category” for Show by and “Programs” for Uninstall by. Under “Programs”, choose “Uninstall a program”.
- Follow the instructions on the screen to uninstall AMD Software. An overview of all installed programs should appear. Locate AMD Software and left-click on it.
The remaining steps should be completed once the above steps have been completed.
- You should now see the system setup window after pressing the Windows + R combination again. Type “msconfig” in the Open text box this time before pressing OK.
- You may check the boot options by going to the “Boot” tab and selecting “Safe boot”. If you select “Minimal,” the box next to the term will be unchecked.
- Select the This computer option at the bottom of the left navigation menu and open the Local Hard Drive after rebooting your computer. You can also click the Libraries button on DeepL Access and select the This computer option.
- Make sure that you remove the ATI or AMD folders from the Applications (x86) and Applications (Applications) folders.
The ATI folder may exist in C:ATI, so you should also remove it. - You can then select the public key token from the details list by right clicking anywhere in the folder, and selecting Details, then clicking OK.
- Delete any entries with a public key token of 90ba9c70f846762e by right-clicking them and selecting Delete.
- If AMD Catalyst Control Center still exists, reinstall the AMD Catalyst package by installing the downloaded driver. If not, uncheck the box next to Secure Boot, reinstall the AMD Catalyst package and reboot your computer.
Install the latest versions of Microsoft .NET Framework and DirectX.
These two features need to be fully updated in order for AMD Catalyst Control Center to function properly. For instructions, click here.
- You can download this framework (recommended) by following this link.
- You can now download the .NET Framework 4.8 Runtime by scrolling down to the Runtime section.
- The Microsoft .NET Framework latest version can be installed by opening the downloaded file and following the on-screen instructions!
In Windows 10, DirectX updates are only available alongside Windows updates, so we strongly recommend installing the latest Windows updates before installing DirectX updates. Follow these steps to get started.
- The settings can also be opened by clicking the Start menu button and selecting the gear icon on the lower left side of the menu.
- By left-clicking on the “Updates and Security” section, you will be able to see your most recent updates.
- Click the Check for Updates button while on the Windows Update tab.
- You will be notified if there are any new updates for your Windows OS by Windows. Click Download and Install Now if you find one.
Install the latest versions of Windows, DirectX, and .NET Framework to see if the problem is resolved!
Removing Windows Updates (Windows 7 users)
To solve the problem, you should uninstall the KB2670838 knowledge base update for Windows 7. Follow these steps to uninstall it.
- Select “Control Panel” from the “Start” menu. If you cannot see the first result, try Windows + R, “control”. Please click OK to proceed.
- Select Uninstall a program in the Programs section if you would like to see the results by category. Click on the “Show by” option.
- You will find the update with KB2670838 in brackets on the left menu. Click on Show installed updates.
- You can try removing it from your computer by left-clicking this entry and clicking the “Remove” button. If you still have the problem, try removing this entry.
RECOMMENATION: Click here for help with Windows errors.
Frequently Asked Questions
What can I do about AMD Catalyst Control Center not opening?
- Update your display drivers. Download and run DriverFix.
- Run Catalyst Control Center from the installation directory. Navigate to the program files (x86).
- Close all Catalyst tasks. Press Win + X.
- Perform an SFC analysis. Go to the beginning and type cmd.
- Update your computer.
How to repair AMD Catalyst Control Center?
Another way to repair the AMD Catalyst Control Center is to run it from its original location. The problem may be that the shortcut on the utility's desktop is corrupted. To do this, go to Software Files/Technology/ATI. ACE/Core-Static/amd64/, and then double-click the CLIStart.exe file.
Is the AMD Catalyst Control Center required?
Since Catalyst Control Center is not a required utility, you can also prevent it from running when you start your computer. It won't give you access to your graphics card's advanced settings, but it should also prevent annoying error messages.
Can’t remove the AMD Catalyst Control Center?
- Click Start.
- Open the Control Panel.
- Select Add or Remove Programs.
- From the list of currently installed programs, select AMD Catalyst Install Manager.
- Select Edit and follow the uninstall steps.
- Restart your system.

Mark Ginter is a tech blogger with a passion for all things gadgets and gizmos. A self-proclaimed "geek", Mark has been blogging about technology for over 15 years. His blog, techquack.com, covers a wide range of topics including new product releases, industry news, and tips and tricks for getting the most out of your devices. If you're looking for someone who can keep you up-to-date with all the latest tech news and developments, then be sure to follow him over at Microsoft.