- Error code 0x80071AB1 can be caused by corrupt or missing system files, faulty or damaged Windows update components, and other system issues.
- In most cases, this is due to a problem with the Windows update feature.
- In this guide, we tell you the causes and some quick ways to fix them.
- Proceed with caution, as some methods require extra attention and dedication.
- Follow the instructions on the screen to perform troubleshooting.
The new Microsoft Windows 11 has been installed, and everything looks great, but you’re looking to install some old programs that require the .NET Framework v3.5 installation. If you uninstalled .NET Framework 4.8 previously, you may want to reinstall it.
It looks as though you have installed Windows 11 from Microsoft with a clean install. But you need to install some old applications that require the .NET Framework version 3.5 installed to work. If you have previously uninstalled .NET Framework 4.8 from Windows, then it might need to be reinstalled.
Windows Autopilot simplifies the entire deployment process, resulting in a better user experience and a higher partner satisfaction rate. Read more about Windows Autopilot here.
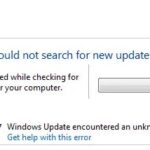
If you receive the 0x80071AB1 error, you should update your system, fix corrupted files, or reset Windows Update components. Try updating your Windows machine, fix corrupted files, or reset Windows update components to see if that helps. When installing Net Framework 3.5, you may encounter an error 0x80071AB1 that can be fixed in 5 ways.
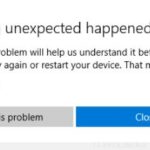
In most cases, this occurs because of a problem with Windows’s update feature. You will receive an error code 0x80071AB1 if you attempt to install it. You will learn about the reasons for this problem and how to fix it in this guide. Be careful with some methods, as they require more attention and time.
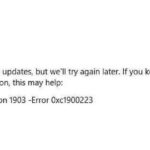
What are the causes for error code 0x80071ab1 in a Windows 10 computer?

It is possible that issues related to Windows updates, corruption or missing system files, or other related issues can cause the 0x80071ab1 code to appear.
How to repair error code 0x80071ab1 on Windows 10 computer?
We highly recommend that you use this tool for your error. Furthermore, this tool detects and removes common computer errors, protects you from loss of files, malware, and hardware failures, and optimizes your device for maximum performance. This software will help you fix your PC problems and prevent others from happening again:
Updated: April 2024

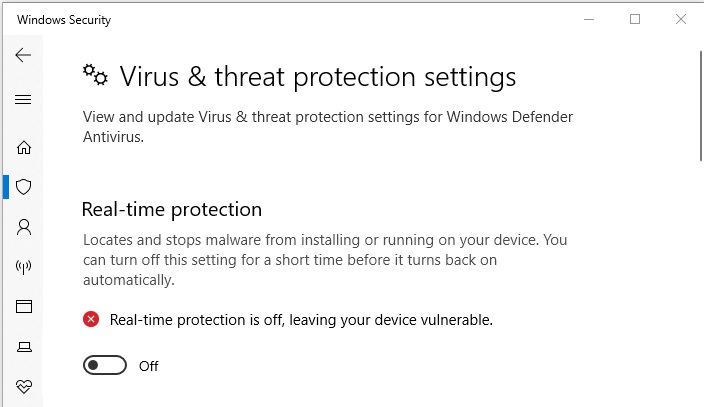
Disable third-party antivirus programs
- Mouse over the toolbar and place the cursor there.
- You can do this by right-clicking the icon for third-party antivirus software.
- Display hidden icons if they aren’t present by clicking the Show Hidden Icons icon (up arrow).
- Select Disable.
- You can disable an application for a specific period of time.
Install Windows update manually
- By pressing Windows + S, you will
- Please enter the update history.
- Press Enter.
- The KB version indicated on the Settings page will be displayed.
- The Microsoft Update Catalog can be accessed by clicking on the link below.
- You can restore KBs by clicking the search bar and typing their numbers into it.
- Enter.
- Your system configuration should match the version you are looking for.
- When you find a version you would like to download, click on it.
- The link ending in MSU will appear on a new page. Click on it.
- You can now double-click the downloaded MSU file.
- In order to install the update completely, follow the instructions on your screen.
Launch the Windows Update Troubleshooting program
- Then press the Windows key plus I.
- You can troubleshoot your problem by selecting Troubleshooting under Settings.
- Troubleshooting can be found by clicking More.
- You can run Windows Update from the next page by clicking Run.
- The troubleshooting instructions on the screen will guide you through the process.
- Choose Apply this fix if an automatic fix is offered by the utility.
- The troubleshooter should be closed.
- It will take effect after you restart Windows.
Free up disk space
- On the taskbar, click Search.
- Type cleanmgr.
- Enter.
- Select the system drive, usually C:, and click OK. If you are not using C:, select B: instead.
- After you click on Clear system files, you will be taken to a new wizard.
- After selecting a drive, click OK.
- The disk cleanup wizard will appear. Click OK to continue.
- You can now delete the files if you wish.
RECOMMENATION: Click here for help with Windows errors.

Mark Ginter is a tech blogger with a passion for all things gadgets and gizmos. A self-proclaimed "geek", Mark has been blogging about technology for over 15 years. His blog, techquack.com, covers a wide range of topics including new product releases, industry news, and tips and tricks for getting the most out of your devices. If you're looking for someone who can keep you up-to-date with all the latest tech news and developments, then be sure to follow him over at Microsoft.