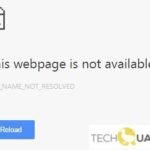
- Some people reported that when they visit the site, they receive an error message stating “DNS PROBE STARTED” What does it mean? Does your browser stop working? Don’t worry, this problem occurs to many people every day.
- Some internet service providers (ISPs) restrict access to certain types of data, including DNS queries.
- If you see this error, it could mean one of three things: Your computer does not know how to resolve the hostname.
There is a high probability of DNS probe errors in the setup process. The White screen of death and 404 not found errors are just some of the common errors that you may encounter. This error is called DNS_PROBE_FINISHED_NXDOMAIN, and it is one of the most commonly seen errors. Most regular computer users have encountered it at least once. Users are not redirected to the target website with this message appearing in their common web browsers.
- Download and install the software.
- It will scan your computer to find problems.
- The tool will then correct the issues that were discovered.
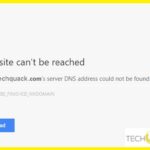
“DNS PROBE STARTED” is the error message some people receive when visiting the site. Do you see a message telling your browser to stop working? Don’t worry, it happens to many people every day. While waiting for the DNS servers to resolve the host address into an IP address, you don’t want to miss out on vital data. Certain types of data, including DNS queries, are restricted by some internet service providers (ISPs).
Here are some solutions to this problem that you might find helpful.
Dns Probe Possible
A DNS PROBE FINISHED NO INTERNET error indicates that the browser is attempting to locate the Dynamic Name Server (DNS) that can direct you to the website you are looking for, but cannot locate it. You can get this error if you lose your Internet connection, but I’ve seen it when I’m using a VPN or getting a new router (I test a lot of routers, so I’ve seen it a lot).
In most cases, DNS_PROBE_FINISHED_NXDOMAIN occurs when your DNS is misconfigured. DNS refers to a domain name system, which connects domains to web servers to direct traffic on the internet. In essence, it converts an ordinary human request into an IP address that is appropriate for computers. This domain name is kinsta.com.
A misconfiguration of the DNS or other problems with Internet settings may also cause this issue. Therefore, you will need to uninstall and reinstall your network drivers, or change the DNS address.
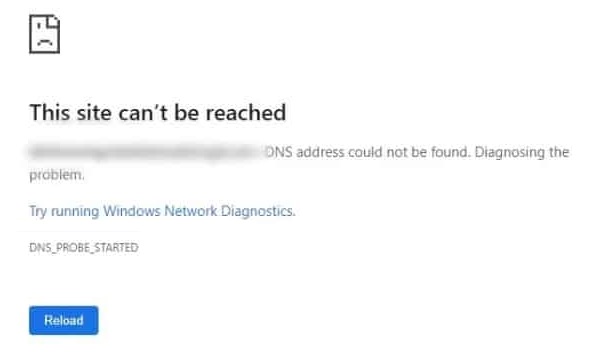
What does DNS_PROBE_STARTED error mean?
What Is Dns Probe
It is also known as DNS Probe Finished No Internet and many users have reported that they regularly receive this error message in Google Chrome.
You receive this DNS_PROBE_STARTED error if your computer’s network connections aren’t functioning properly. Whenever you connect to the Internet, your computer sends out a request for information about a particular website’s address. An IP address is requested and the response is returned by your Internet service provider.
In Google Chrome, you may get the DNS_probe_started error from time to time. This error message occurs when visiting a specific internet site. The issue has to do with a network problem, however. Misconfiguration of DNS settings and other internet settings are also likely to cause this problem.
Usually, this error occurs as a result of a problem with your computer’s or device’s default DNS servers. It can be easily fixed by using another DNS service, like Google’s DNS or OpenDNS.
In some instances, your request may be lost in the network. This may be due to your computer’s insufficient bandwidth, or your router or modem may not be functioning properly.
What causes the DNS PROBE STARTED error on Google Chrome?
The DNS probe starts error occurs when the hostname specified in the URL cannot be found by the system, causing the system to create the request. You may encounter this error due to the following reasons:
- The hostname cannot be resolved by your computer.
- It appears that you typed the hostname incorrectly.
- An internet connection problem has occurred.
How to repair the DNS_PROBE_STARTED error?
Network driver reinstallation and uninstallation

Nxdomain
Is it important for you to monitor DNS traffic, specifically NXDOMAIN traffic, when it comes to BYOD traffic that goes to the Internet for security threats? NXDOMAIN is an error message that is received by the DNS resolver (client) when the domain cannot be resolved to an IP address after a request to the DNS is sent to the DNS. This means that the domain doesn’t exist and you receive the NXDOMAIN error message.
There are also times when this error has been linked to modem problems, and it affects all sites you try to access. The error message includes the letters DNS to indicate where the issue is.
Here are some instructions on how to uninstall and reinstall the network driver to see if that resolves the problem.
The first step is to uninstall all existing network drivers on your computer
Dns Probe Started Meaning
The DNS probe failed to start as a result of a variety of causes. Typically, it occurs in Chrome, but others, including Microsoft Edge and Android, may also encounter this issue.
The following instructions will assist you in uninstalling the network driver:
Once you click the Windows icon in the bottom left corner, enter Device Manager into the Searchfield.
As soon as this is displayed, it should be visible in the Device Manager.
The second step is to completely remove the network driver
Select “Control Panel” from the “Start” menu and then open the Control Panel window. Locate the network adapter under Network adapters, expand it, and delete it in the Device Manager window. When you have finished, click the “Hardware and Sound” button again and select “Device Manager.” For each network adapter, repeat this process.
Updated: April 2024
We highly recommend that you use this tool for your error. Furthermore, this tool detects and removes common computer errors, protects you from loss of files, malware, and hardware failures, and optimizes your device for maximum performance. This software will help you fix your PC problems and prevent others from happening again:
- Step 1 : Install PC Repair & Optimizer Tool (Windows 10, 8, 7, XP, Vista).
- Step 2 : Click Start Scan to find out what issues are causing PC problems.
- Step 3 : Click on Repair All to correct all issues.

Clearing the cache and cookies
![]()
The following steps are for clearing all your browser data, in case the above solution didn’t work for you.
Start by going to the “Settings” menu in your browser.
In the Privacy & Security section, click “Advanced Settings.”
You can clear your browsing data by scrolling down.
The following steps are to be taken. Step 4: Select “All but passwords and autofill entries.”.
You can now clear the data by clicking “Clear now”.
6. See if you can access the same website again by going back to your home screen.
Doing a DNS refresh
It is possible to try a third fix if the two fixes above don’t work. In short, a DNS refresh is needed to resolve the issue. In short, the DNS is the Domain Name System. A domain name is mapped to an IP address when it is typed into a browser. When the browser requests the IP address of the URL, the DNS server looks it up and returns it to the browser.
The steps for refreshing the DNS are as follows:
In Run, type cmd.
2. Press Enter.
You can now flush your DNS by typing ipconfig /flushdns.
Your computer should be restarted.
5. Try again.
Changing the IPv4 or IPv6 DNS address
The IPV4 or IPV6 DNS addresses must be entered correctly. Your website will not function properly if you enter the incorrect DNS address.
These steps will guide you through changing your DNS address.
Dns Probe Finished No Internet Macbook
In the spotlight search box, type system preferences on your Macbook. Select Network, then Wi-Fi connection, and then advanced. Once you are in the TCP/IP tab, you need to make sure that DHCP is set to Using DHCP. I would then go to the DNS tab and remove all entries that are not necessary. You can either renew the DHCP lease by clicking “Renew DHCP lease” or you can disconnect and rejoin the network again from the TCP/IP tab.
If DNS_PROBE_STARTED does not show up in the system log, it may indicate a DNS or network issue.
You need to log in first.
Step 2. Select the gear icon on the left side of the screen.
Choosing Settings is the next step.
Click on Network & Internet at the bottom of the screen.
The DNS tab can be found by following step 5.
The DNS address needs to be entered correctly.
Changes should be saved.
Software such as antivirus and firewall should be disabled
In addition to protecting you from various problems, including malware, antivirus and firewall tools are essential.
The DNS_PROBE_STARTED error may, however, be caused by your antivirus software blocking DNS queries. The firewall can also be temporarily disabled or its settings can be changed if that resolves the issue. You can temporarily disable it and see if that solves the problem.
Using the Search box in the Control Panel, enter “Control Panel” to check your firewall settings.
In Step 2, choose “System and Security,” then click “Windows Defender Firewall” and allow the application or feature through it.
You will then see a window with the option to change the settings.
The plus (+) sign allows you to add a DNS client if it isn’t listed.
Save your changes by clicking OK when you are finished.
RECOMMENATION: Click here for help with Windows errors.
Frequently Asked Questions
Why does the DNS_Probe_Started occur?
This is a common bug in Google Chrome. Many users report that they often encounter this problem. Typically, this error is caused by a problem with the default DNS server that your computer or device uses.
What is the reason for my DNS probe errors?
This means that your browser has failed to connect to the Internet. Typically, DNS errors are caused by problems on the user side, whether it's your network or Internet connection, improper DNS settings, or an outdated browser.
What should I do if I receive a DNS error message?
- Restart your router.
- Clear your browser cache.
- Clear your DNS cache and update your IP address.
- Manually change your DNS settings.
- Delete the temporary files.

Mark Ginter is a tech blogger with a passion for all things gadgets and gizmos. A self-proclaimed "geek", Mark has been blogging about technology for over 15 years. His blog, techquack.com, covers a wide range of topics including new product releases, industry news, and tips and tricks for getting the most out of your devices. If you're looking for someone who can keep you up-to-date with all the latest tech news and developments, then be sure to follow him over at Microsoft.