- Windows 10 is a great operating system, but sometimes you may experience problems with it.
- One common issue that people seem to have is the “time sync failed” error.
- This can be frustrating, but don’t worry, we are here to help! In this blog post, we will discuss what causes this error and how to fix it.
- Download and install the software.
- It will scan your computer to find problems.
- The tool will then correct the issues that were discovered.
There are times when you may encounter problems with Windows 10. We will discuss in this blog post what causes this error and how to fix it, and what you need to do in order to fix it. Many people seem to be experiencing the “time sync failed” error.
Compatibility: Windows 10, 8.1, 8, 7, Vista, XP Download Size: 6MB Requirements: 300 MHz Processor, 256 MB Ram, 22 MB HDD Limitations: This download is a free evaluation version. To unlock all features and tools, a purchase is required. Starfleet Command 3 Directx 8.1 Error may be caused by a number of different reasons. FAQs. If you have Starfleet Command 3 Directx 8.1 Error then we strongly recommend that you. This article contains information that shows you how to fix Starfleet Command 3 Directx 8.1 Error both (manually) and (automatically), In addition, this article will help you troubleshoot some common error messages related to Starfleet Command 3 Directx 8.1 Error that you may receive. Note: This article was updated on 2018-02-03 and previously published under WIKIQ210794. Contents.
When you use various programs on your PC, you may encounter problems if your PC does not set the date and time accurately. You should configure your PC for the accurate date and time if your PC does not do so. Your PC’s automatic clock sets the date and time automatically based on where you are in the world. In this article, we will discuss the various ways in which the time can be set correctly to solve the Time sync failed problem in Windows 11. It can cause various problems while browsing and using various applications.
What does ‘Time Sync Failed’ mean?
When time sync is enabled on Windows 10, users do not have to worry about time discrepancies. By default, time.windows.com is considered the time synchronization server for most users. When this feature is enabled, it synchronizes the time with several servers worldwide.
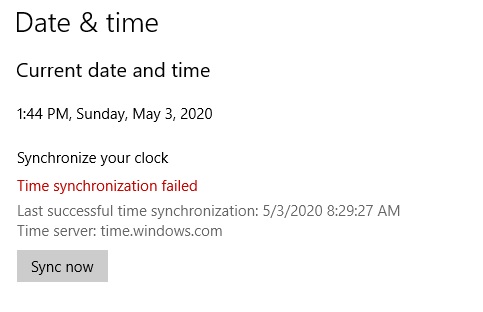
In the Windows Control Panel, a message appears saying, “Time could not be synchronized with time.windows.com.”.
Windows 10 Time Synchronization Failed
Usually, this error occurs when Windows Synchronization service cannot connect to the server with which it normally syncs. The issue could arise due to a number of reasons, including a problem with Windows Time service, a problem with a local network connection, or another issue.
Time Sync In Windows
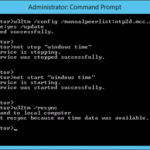
Using the Windows net time command is the easiest way to update your computer’s clock with a time server.
A problem occurred when time.windows.com synchronization failed. What should I do?
As a result of the timeout period expiring, time.windows.com was not synchronized with Windows.
Why am I getting a “Time synchronization failed” message?
A Windows synchronization service error occurs when it is unable to connect to the server it normally synchronizes with. For instance, the Windows synchronization service might not work or a local network connection might block some protocols, which can explain this problem.
In addition to the time and time zone not being synchronized on your computer, your third-party antivirus/firewall program may also be to blame.
Windows 10 Time Not Syncing
Here is what you need to do to fix this Windows time sync problem.
Windows Time-sync
NetTime is syncing, but the time is out by an hour – e.g. Daylight savings time isn’t be honoured correctly: NetTime works internally with UTC (Universal Time) and doesn’t have any code for handling daylight savings or time zones. As long as Windows is configured correctly, it should automatically handle daylight savings changes for you. If Windows isn’t handling it correctly, it most likely needs to be updated. You can also manually your time zone information using the free Microsoft tool: Windows Time Zone Editor tzedit.exe Alternatively, the Windows Server 2003 Resource Kit Tools reportedly includes a command line timezone.exe tool for advanced users.
How to resolve the “Time Sync Failed” error
Disable the third-party firewall
Performing the following steps on your Windows 10 computer will deactivate third-party virus protection software.
When you enable w32time on your system, it must not contain any other NTP daemon. Otherwise, the two services will be in conflict. You can check that w32time is running by going to Control Panel – Administrative Tools – Services. In the “Windows Time” feature, check its Status, which should be “running”. If possible, set the Startup Type to “Automatic” or “Manual”.
- You can find this section in the Security and Maintenance section of the Windows Control Panel.
- You can switch between multiple security settings by clicking the Security link in Security and Maintenance.
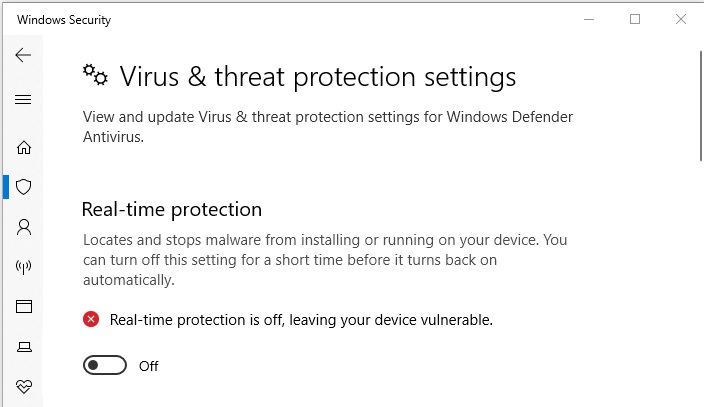
- To turn off real-time protection, scroll down to the Virus Protection option. Click on Virus Protection and select Turn Off Real-time Protection.
- Once the real-time protection is turned off, click Yes to confirm you want to turn it off.
- Now that third-party antivirus software has been deactivated on your Windows 10 computer, you can begin to use it again.
Set the Windows time service to automatic mode
Updated: April 2024
We highly recommend that you use this tool for your error. Furthermore, this tool detects and removes common computer errors, protects you from loss of files, malware, and hardware failures, and optimizes your device for maximum performance. This software will help you fix your PC problems and prevent others from happening again:
- Step 1 : Install PC Repair & Optimizer Tool (Windows 10, 8, 7, XP, Vista).
- Step 2 : Click Start Scan to find out what issues are causing PC problems.
- Step 3 : Click on Repair All to correct all issues.

It’s easy to set Windows 10’s time service to automatic. Here’s how:
- You can find services by searching the Start menu.
- You can find Windows Time in the Services window.
- The properties window of a service can be opened by double-clicking it.
- Make sure that you select “Automatic” under “Startup type” in the properties window.
- Make sure the changes are saved by clicking “Apply.”.
- Your computer needs to be restarted after closing this window.
Here are some simple steps that will help you keep the time correct on your Windows 10 computer.
Update the time settings on the Internet
In Windows 10, you can easily update your computer’s clock by following these simple steps:
- The Date and Time settings window will appear when you click on the clock in the bottom-right corner.
- The “Internet time” tab can be found by clicking here.
- Then, click “Change settings”.
- The “Server” field should be filled in with the address of a time server.
- To update now, click “Update now”.
- This window will be closed when you close it.
Your computer’s clock will always be accurate if you follow these steps.
Launch SFC scan
Here’s how to use the built-in system file checker in Windows 10 to scan and repair system files if they contain errors.
- Click Windows + R, type cmd, and then click Enter to open the Command Prompt.
- Press Enter to initiate a scan of your system files using sfc /scannow.
- There will be an automatic repair of any errors found.
- Check if the issue has been resolved by restarting your computer after the scan is complete.
Start DISM
As part of Windows 10, you can perform DISM scans, which are one of the most effective ways to keep your PC running smoothly. As well as repairing corrupt files and system settings, this tool can improve performance by removing unnecessary files. You can run DISM scans on Windows 10 by following these steps:
- Search can be accessed by pressing Windows + S.
- Press the Enter key to bring up Command Prompt.
- In the Command Prompt, type DISM /Online /Cleanup-Image /RestoreHealth.
- Upon completion of the scan, you’ll see a report with the results and instructions for fixing any issues detected. If there were any issues found, they’ll be mentioned in the report.
Update outdated BIOS
This article will help you understand what a BIOS is. The Basic Input Output System (BIOS) controls the flow of information from hardware to software on a computer. As a result, it boots your PC and ensures that all of your devices are functioning properly. Because it’s so important, it’s important to keep the BIOS updated. On Windows 10, you can do this as follows:
- The manufacturer of your computer should have the most recent BIOS update.
- Extraction of BIOS update files can be done by running the downloaded executable.
- A USB flash drive should be used to store the extracted files.
- If you need more information, consult the manual that came with your computer. You will be asked to restart your computer and enter BIOS setup mode. You will be asked to press F1, F2, or Del during startup.
- Use the arrow keys to select “Update BIOS” in BIOS setup mode.
- As soon as you are finished updating your BIOS, save any changes you have made and exit the BIOS setup mode by following any prompts.
Maintaining your BIOS by following these steps will ensure it runs smoothly at all times.
RECOMMENATION: Click here for help with Windows errors.
Frequently Asked Questions
Why did my computer’s time suddenly change?
There are a number of reasons why your computer's time might suddenly change. It could be a problem with the battery, the CMOS settings, or even the BIOS. If you're not sure what's causing the problem, it's best to contact your computer's manufacturer for assistance.
What can I do to fix the 'time sync failed' error?
There are a few things you can try to fix the 'time sync failed' error on Windows. You can make sure that your computer's clock is always accurate by following the steps in this article. You can also launch an SFC scan or start DISM to repair corrupt files and system settings, as well as improve performance by removing unnecessary files.
How can I prevent this from happening again?
There are a few things you can do to prevent this error from happening again. First, make sure that your computer's clock is always accurate by following the guide in this blog post. You can also launch an SFC scan to repair corrupt files and system settings. Finally, be sure to keep your BIOS up-to-date to prevent any future problems.
What are some alternative ways to keep my computer’s time accurate?
There are a number of alternative ways to keep your computer's time accurate. You can use an atomic clock, which is the most accurate way to keep time. You can also sync your computer's clock with an online time server. Finally, you can set your computer to automatically adjust for daylight savings time.

Mark Ginter is a tech blogger with a passion for all things gadgets and gizmos. A self-proclaimed "geek", Mark has been blogging about technology for over 15 years. His blog, techquack.com, covers a wide range of topics including new product releases, industry news, and tips and tricks for getting the most out of your devices. If you're looking for someone who can keep you up-to-date with all the latest tech news and developments, then be sure to follow him over at Microsoft.