- The CMOS checksum error is essentially a conflict between the CMOS and the BIOS that occurs when the PC starts up.
- When the computer shuts down, the PC writes a number that should match the number that the PC generates when the computer reboots.
- This is an error detection mechanism called a “checksum,” also known as a redundancy check to detect errors in the data.
- If your computer’s battery is physically damaged, this can lead to this CMOS error.
- Download and install the software.
- It will scan your computer to find problems.
- The tool will then correct the issues that were discovered.
If you want to know how to fix the CMOS checksum error, you should read this post. It will show you the main causes of this error. Besides, you will get useful solutions to fix this error. For now, you can get these viable methods from the Techquack website.
Checksum Errors
In order to detect errors that may have occurred during the transmission or storage of digital data, checksums are small data blocks derived from another block. Data integrity is often verified by checksums alone, but data authenticity cannot be verified by checksums alone.
Checksums detect errors in two parties by checking the CMOS and BIOS data for differences. Computer systems encounter problems when CMOS and BIOS data are mismatched.
As a result of this CMOS error, the BIOS and the CMOS do not agree on the checksum that should be applied to the PC while it is booted up.
CMOS Checksum Bad Error is an error that computer users may encounter for a number of reasons. Although it may be frustrating, it is fairly straightforward to fix.
A CMOS checksum error may occur if the two values don’t match. This mechanism detects errors in the data by performing a redundancy check.
How CMOS and BIOS work

System Cmos Checksum Bad
A checksum is computed as an error detecting code to guard the BIOS settings stored in the CMOS memory. The CMOS Checksum Bad Error is an error that occurs when the CMOS values turn out to be incorrect. The CMOS memory stores a specific value normally to guard the BIOS software. Each time the computer is booted, this value, which is a number is checked against the stored value in the CMOS memory. If these two values are different, it causes a CMOS Checksum error message. If these values are the same, the computer boots normally.
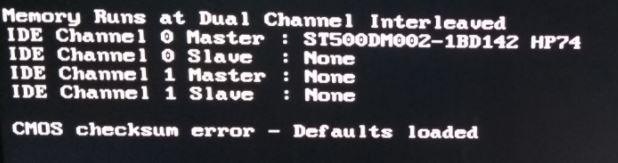
The following message may appear if the BIOS or CMOS is not working correctly.
There are a number of parameters and commands on the board of a computer that make up the BIOS (Basic Input/Output System).
It is possible that the CMOS has been reset to factory default settings when a CMOS checksum error occurs. It is likely that the CMOS was re-initialized, which caused this error. You will learn how to fix it in this tutorial.
A BIOS controls the hardware components of the computer, such as memory, processor, and peripherals, on which the operating system runs. The operating system controls the software running on the computer.
Your PC’s BIOS manages the relationships among all of the hardware components, synchronizing time and date, as well as maintaining important system data, such as time and date.
Cmos Failure
It doesn’t mean the motherboard is physically damaged if it doesn’t display CMOS “fail” error during boot up.
CMOS (Complementary Metal Oxide Semiconductor) is the storage location where the BIOS (Complementary Metal Oxide Semiconductor) stores all the BIOS settings. As a result, the operating system cannot run without the BIOS.
The BIOS can’t match the BIOS settings before shutting down a computer or while booting it when the BIOS fails.
What is the cause of a CMOS checksum error in Windows?

The Cmos Checksum Is Invalid Hp
Usually, a normal restart will resolve an error. If the error persists after restarting, further steps will need to be taken.
Improper system shutdown: This is one of the most common causes of CMOS errors; improper system shutdown can corrupt BIOS values. A sudden power failure while using your computer can also affect the CMOS and cause this error message.
After updating the BIOS: Sometimes when a user updates the system BIOS, the values stored in the CMOS may be reset. Therefore, it is recommended to reboot the CMOS and reconfigure all values. Then save and exit the CMOS configuration.
Low Battery: If the battery required by CMOS to maintain the BSOD settings while the computer is turned off is low, it will cause a checksum error.
Damaged or outdated BIOS: To stay in sync with the operating system and hardware components, the BIOS must be updated. Sometimes the cause of the error becomes more sinister, as viruses discreetly change the checksum value. In this case, a CMOS checksum error occurs.
Damaged motherboard: If your computer’s motherboard is physically damaged, this can lead to this CMOS error.
How to fix a CMOS checksum error in Windows 10?
Updated: April 2024
We highly recommend that you use this tool for your error. Furthermore, this tool detects and removes common computer errors, protects you from loss of files, malware, and hardware failures, and optimizes your device for maximum performance. This software will help you fix your PC problems and prevent others from happening again:
- Step 1 : Install PC Repair & Optimizer Tool (Windows 10, 8, 7, XP, Vista).
- Step 2 : Click Start Scan to find out what issues are causing PC problems.
- Step 3 : Click on Repair All to correct all issues.

If the error persists, you can try the other options. If the error is resolved with restarting your computer, the checksum should be updated and the error should be eliminated.

Replace the CMOS battery
There is a connection between this problem and the CMOS battery. When a battery is old enough to be more than a few years old, it is no longer able to supply enough voltage to the CMOS, resulting in this problem. This means it is time to replace it. You can’t start your computer without these batteries, so make sure you follow the instructions below so that you can replace it.
Find the CMOS battery connected to the computer’s motherboard in the computer case. Consult your motherboard or computer documentation if you cannot locate the CMOS battery pack. You may also need to consult the Internet or contact your computer manufacturer if you need help.
Note: Some computers may require you to disconnect cables, remove disks, or remove other parts of the computer to physically access the CMOS battery.
A coin cell battery is relatively easy to remove from your computer if it is inserted in the slot. Grab the edge of the battery with your fingers and pull it up. Depending on the motherboard, removing the battery may require lifting a clip which holds it in place.
Try to start the computer, and if there is a CMOS checksum error, let it out for 10 minutes, and try inserting another one like above.
Resetting the BIOS to default settings
Having incorrect BIOS settings is another major contributing factor to this problem. It’s not uncommon for BIOS settings to get corrupted, and when they do, it is always a problem. It may be the result of a BIOS update or even malware. Regardless of the cause, a default reset should definitely fix the issue if you are able to access it!
- Try pressing the BIOS button when the computer boots to access the BIOS settings. Usually, a BIOS button appears on the boot screen and says, “Press this key to enter the configuration,” but you can also press other keys. F1, F2, Del, etc., are the usual keys to get to the BIOS.
- According to the Dell computer’s BIOS version, the default boot option may appear at different locations on the screen.
- In the main BIOS settings screen, click the Restore Settings button next to the Exit button. Make sure you have selected the default BIOS options before clicking OK. If you do not see the Restore Settings button, it is somewhere else in the BIOS settings screen. Then click Exit and your computer will restart.
- Alternatively, if there is no Exit button on the BIOS home screen, you can click the down arrow on your keyboard until Restore Defaults (or Load Defaults) appears.
- After you have entered Enter, your computer will restart and you should be able to use your computer.
BIOS Repair (Intel motherboards)
It has been reported that some versions of Intel desktop BIOS just begin to display problems after a while on some desktops. This problem can only be resolved by performing a BIOS recovery through a bootable USB stick by installing the latest version. If you have an Intel desktop board, follow these steps only!
- The BIOS files you need can be found on their website. Be sure to enter the appropriate installation information so you can find them. Be sure to download the file.
- If you are using an older version of Windows (Windows 7 and above), you can open the “Libraries” entry in your PC or open a folder on your PC and click the “This PC” option in the left menu. Make sure the file is formatted to FAT32 before copying it to your USB device.
- Select Format… from the pop-up menu that appears when you right-click the USB drive you want to format.
- Click Format in the Format window. Select the FAT32 file system if it hasn’t already been selected under File System. Finally, click OK to complete the formatting process.
- In this PC, double-click the USB device to open the root folder. Copy the file to the root folder.
- Unplug the power cord, turn off the PC and remove the BIOS jumper from its position. It is shown below. Connect a USB device to the target PC’s USB port and connect the USB device to the USB port of the target PC.
- In either case, remove the USB device, remove the BIOS setup jumper, and reinstall the jumper (above – picture on the right) after the computer has finished the update.
- You can test the CMOS checksum error by closing the case and restarting the computer.
Reboot the computer.
The error should be cleared after a normal restart, but if the error persists, then it needs to be addressed directly.
Contact a technician or computer repair technician.
A new motherboard should not be purchased or reworked if all the above steps fail. Instead, contact a professional to inspect the device before purchasing the new machine.
RECOMMENATION: Click here for help with Windows errors.
Frequently Asked Questions
How do I correct the CMOS checksum error?
- Reboot the computer. A normal restart usually generates a new checksum and fixes the error.
- Download and flash the BIOS update. Download the update from the motherboard manufacturer's website.
- Reset the BIOS.
- Replace the CMOS stack.
- Consult a technician or computer repair specialist.
What does “checksum bad” CMOS mean?
A CMOS checksum error is an error that occurs when incorrect CMOS values are detected. CMOS memory usually stores a certain value to protect the BIOS software. Each time the computer starts up, this value, which is a number, is compared to the value stored in the CMOS memory.
What are the causes of a checksum error?
The most common cause of a checksum error at startup is a defective battery that does not provide sufficient power to the motherboard when the computer is turned off. However, motherboard failures and viruses can also contribute to checksum errors.
How to solve a CMOS battery problem?
- Turn off the computer.
- Unplug the power cord to make sure your computer is not getting power.
- Make sure that you are logged into the system.
- Locate the motherboard battery.
- Remove it.
- Wait five to 10 minutes.
- Replace the battery.
- Turn on the computer.

Mark Ginter is a tech blogger with a passion for all things gadgets and gizmos. A self-proclaimed "geek", Mark has been blogging about technology for over 15 years. His blog, techquack.com, covers a wide range of topics including new product releases, industry news, and tips and tricks for getting the most out of your devices. If you're looking for someone who can keep you up-to-date with all the latest tech news and developments, then be sure to follow him over at Microsoft.