- Microsoft removed the Windows 10 HomeGroup feature in the latest version of Windows 10 1803.
- Microsoft describes that this feature was obsolete and had no place in today’s world of cloud storage.
- Users say they don’t find the feature in Windows 10.
- How can you share files without missing a membership group? How do you find them? We show you how to use the feature without a Windows 10 membership group to share files and printers with other members of your homegroup.
- Download and install the software.
- It will scan your computer to find problems.
- The tool will then correct the issues that were discovered.
Windows 10 Home Group
Microsoft introduced HomeGroup to make it easy for Windows devices to share resources with other PCs on a local network via an easy-to-set-up interface. HomeGroup is a network sharing feature that has been in Windows for a long time, and it is also a part of Windows 10.
Sharing Printers
Install the printer drivers.[1] Before you can share a printer, you have to install the drivers on your computer. Most printers today are USB connected and will install automatically.
Due to the removal of HomeGroup on Windows 10, users are now required to use other methods to share files, folders, and printers across a small network.
I have two houses I need to network together for family members. They are across the street from each other in a small residential neighborhood. I have linked the two houses with Ubiquiti hardware and the hardware works great. My problem is that I cannot seem to get windows 10 to fileshare correctly. I have been to a few sites with no luck trying to figure out my problem. I have read through about 3 “read this before posting” posts trying to find my problem as well. One of the pc’s has windows 10 pro and the other a home edition. Not sure if this is my problem either. I know I’m missing info but I don’t want to make the post too long. Let me know what other info I can provide.
In the Network and Sharing Center, you must first create or join a HomeGroup before sharing.
HomeGroup was a great way to share resources across a home network before Microsoft removed it from Windows 10.
Has the Windows 10 homegroup disappeared? How can I share files without missing a membership group? How do I find them? This Techquack post shows you how to fix your Windows 10 homegroup problem. You can also visit Techquack for more tips and solutions for Windows.
Sharing File On Network
A computer and a server can share files directly over the network or indirectly.
When using Windows 10, you can configure HomeGroup by using the Control Panel. The “Network Connections” icon. Select “Internet Protocol Version 6”. This will allow you to select a network type based on the type of network you’re connected to. Then, select “Share folders.” The HomeGroup option should appear in the Control Panel if you are connected to the same network. Press “Manage network adapters” to view the settings.
Users can share files and folders with ease using the HomeGroup feature added by Microsoft to Windows 7 operating system. HomeGroups occur when PCs connected to the same network create their own virtual network.
As part of the Spring update, Windows 10 will no longer support HomeGroup. But you still have the option to share files and printers.
Overview of the missing Windows 10 homegroup

The password to your HomeGroup can be changed if you lose access to it. You can change this password by opening the Control Panel, clicking on the HomeGroup option, and then clicking the Change homegroup settings button. The classic Control Panel will appear after clicking “View or print your homegroup password.”
Homegroups are groups of computers that share files and printers on a home network. Windows HomeGroup allows you to easily share files as well as printers with other homegroup members.
Despite this, users are reporting that Windows 10 does not have the Homegroup feature. The Homegroup feature has been removed in Windows 10 1803 and is no longer available in File Explorer, Control Panel, or Settings. It is impossible to find any references to Homegroup in Windows 10.
Users, however, claim that the homegroup feature does not exist in Windows 10. In fact, Microsoft removed the feature from File Explorer, Control Panel, and Settings in Windows 10 1803. The HomeGroup feature is no longer present in Windows 10. Therefore, you will not be able to find any references to it.
Windows Homegroup was a feature that was introduced in Windows 7 as an innovative way of sharing files between computers. It created a password to join a specific group of computers all of which were then linked together and allowed the sharing of Files and Printers. This way the “Libraries” and other Files/Folders could be easily shared between multiple computers on the network. In a similar way, a certain printer connected to a particular computer on the network could be used by all the people on that Homegroup.
How do you share files when Windows 10 doesn’t have a membership group? In the next section, you’ll learn how.
How To Share A Printer In Windows 10
Your shared printer can be connected to multiple ways once it has been set up. Click on the Add Printer button in Devices and Printer, then select The printer I want isn’t listed. Click on the Browse to the printer on your network radio button, then select the Shared Printer by name radio box.
Why was the homegroup removed?

Fileshare Windows
In general, files and printers are shared most frequently.
For some people, as well as for offices, this feature is of great importance. In the latest version of Windows 10, Microsoft has removed this feature completely, saying that it is obsolete in today’s cloud-based world. Version 1803 and all future versions will no longer include this feature.
The Windows 10 operating system still mentions Homegroup, even though it’s no longer present.
Select the file or folder you wish to share in File Explorer and right-click it, select Properties, then select Sharing. If the Network File and Folder Sharing feature is greyed out, you should select Advanced Sharing.
In spite of the device not having a noticeable effect on performance, people continue to use it.
What if you can’t find Windows 10 HomeGroup?
Updated: April 2024
We highly recommend that you use this tool for your error. Furthermore, this tool detects and removes common computer errors, protects you from loss of files, malware, and hardware failures, and optimizes your device for maximum performance. This software will help you fix your PC problems and prevent others from happening again:
- Step 1 : Install PC Repair & Optimizer Tool (Windows 10, 8, 7, XP, Vista).
- Step 2 : Click Start Scan to find out what issues are causing PC problems.
- Step 3 : Click on Repair All to correct all issues.

We are going to show you how to fix Windows 10 Homegroup missing, in this post from MiniTool. Did this post make any sense to you? No jargon. Tina Follow us. Incorrect instructions. Please submit any feedback you may have.
You will find Ethernet in the left-hand menu, and HomeGroup in the right. Open Settings, then open the Network & Internet section.

Replacing Windows 10 HomeGroup
- This computer needs to be opened.
- Select the membership group and change the group’s settings by right-clicking on it in the left pane.
- You will be taken to the new window where you can exit your homegroup by clicking on it.
Ensure the following settings are in place for the network and discovery:
- Cortana can be found by typing “Control Panel” into the search box and then selecting the first result that appears.
- The Shared Center and Networks options should be selected.
- You can adjust sharing settings at any time by selecting “Advanced sharing settings”.
- Share files and printers by enabling network discovery on the Private tab.
- Shared folder sharing can be enabled by clicking All Networks on the left.
- Make the necessary changes and click Save.
The service settings should now be changed as follows:
- Select the first result from the list of options when searching with Cortana – click on the search box, enter services, and click on the first result.
- Feature Discovery Provider Host, Feature Discovery Resource Publishing, SSDP Discovery, and UPnP Device Host are all on the list.
- Using the right-click menu, select Properties – > and select Automatic startup.
- To save the settings for each service listed above, click OK.
Let’s see what actions are available:
- In the address bar of File Explorer, type localhost.
- Select Properties from the right-click menu when you create a new folder.
- Select Advanced Sharing from Sharing ->.
- By clicking Permissions, you can share this folder with others.
- Click Apply and OK and select Full Access from the Allow column.
- Now, PCNAMEFolder_name will appear as the folder name when you navigate to it.
- In order to increase security, you should only share files with specific users and adjust your settings accordingly.
Please follow the steps exactly as written in this article to activate Windows 10 membership group sharing features.
RECOMMENATION: Click here for help with Windows errors.
Frequently Asked Questions
How do I get the HomeGroup back in Windows 10?
- Open this computer.
- In the left pane, check to see if a membership group is available. If it is, right-click on the membership group and select Change Membership Group Settings.
- In the new window, click the Exit Membership Group button.
Why can’t I find the membership group in Windows 10?
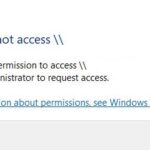
The membership group does not appear in the Control Panel, which means that you cannot create, join, or leave the membership group. The HomeGroup does not appear on the troubleshooting screen when you go to Settings -> Updates and Security -> Troubleshooting. You cannot share new files and printers using a membership group.
What has replaced the home group in Windows 10?
- OneDrive for file storage.
- A sharing feature that allows you to share folders and printers without using the cloud.
- Using Microsoft accounts to share data between applications that support synchronization (such as the email app).
How do I set up a home network on Windows 10 without a member group?
- Open the "Settings" application of Windows 10.
- Open "Network and Internet."
- Select "Ethernet.
- Select "Network" (the state can be "connected" or "disconnected").
- Under "Network Profile," select the "Private" option.
- Then try to see the other computers on your network in the file browser.

Mark Ginter is a tech blogger with a passion for all things gadgets and gizmos. A self-proclaimed "geek", Mark has been blogging about technology for over 15 years. His blog, techquack.com, covers a wide range of topics including new product releases, industry news, and tips and tricks for getting the most out of your devices. If you're looking for someone who can keep you up-to-date with all the latest tech news and developments, then be sure to follow him over at Microsoft.