- There are several blue screen errors like 0x80070017 error, hal.dll BSOD error, and one of them is amifldrv64.sys.
- The blue screen error can be caused by conflicts between the two third-party drivers.
- We offer solutions to these possible problems: fix the problem with the built-in diagnostic tool that is present in Windows 7, Windows 8.1, and Windows 10.disable Driver Verifier.
- Download and install the software.
- It will scan your computer to find problems.
- The tool will then correct the issues that were discovered.
Cldflt.sys Blue Screen
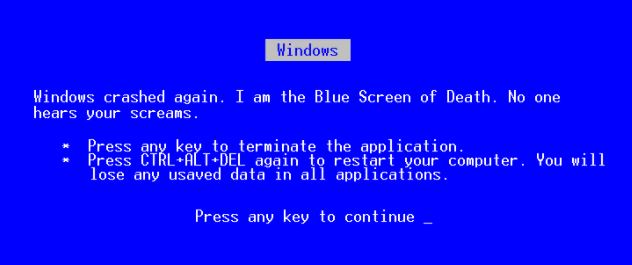
Blue Screen is a tormenting issue appearing with system crash, hang, and freeze. The error, with the default settings, compels a PC to reboot at once. On several occasions, after the restart, the Blue screen still appears and then you need to step forward to start the repair task. Cldflt.sys is such an error that can be seen in conjunction with different stop codes. These may be System Service Exception, Page Fault In A Nonpaged Area, Kmode Exception Not Handled, System Thread Exception Not Handled, and Kernel Data Inpage. In all cases, the BSOD shows What failed: Cldflt.sys which means the system crashed due to failure of this file.
This post of MiniTool tells you what amifldrv64.sys is, what causes BSOD errors due to amifldrv64.sys, and how to fix it.
It is important to understand what amifldrv64.sys is before discussing how it can cause blue screen error 0x80070017, hal.dll, and amifldrv64.sys.
In addition to being located in C:WindowsTemp, Amifldrv.sys is also used by MSI: American Megatrends, Inc, for foreigners. Currently, there are no comments about this file. It is 13864 bytes (13KB) in size.
Updating from USB flash drive:
1. Copied zip file contents (AMIFLDRV32.SYS, AMIFLDRV64.SYS, and H67MIHT2.10.EXE) to the flash drive.
2. Launched the EXE from the falsh drive as Administrator. Got the warning to kill all other programs. Complied.
3. When the EXE was done, it prompted me to reboot. Complied, leaving the flash drive drive in.
4. Upon restart in BIOS 2.10, no change in behavior (looping through every menu entry).
5. The UEFI never detects anything useful on the flash drive (“not found”). WHen it gets to that pop-up, I click it to retry detection several times but it fails each time. So, I click on Configuration or just let it timeout and go back to the looping throu8gh the configuration.
In the event that you attempt to update the BIOS directly from the operating system, you should be aware that this is not a good approach, as it can result in various BSODs when the two third-party drivers conflict. You may be able to update the BIOS from a flash drive if possible.
What causes Amifldrv64.sys BSOD during a BIOS update

On a Dell 8930 W1064Pro I got a message to flash the bios. URGENT. I downloaded the package and flashed. This left two icons on my computer: “Removed apps.html” and, more problematic, the system file “amifldrv64.sys.” Three months ago I also flashed the biosand just the amifldrv64.sys appeared on the desktop. Without too much forethought, I renamed it (I know don’t mess with system files), and rebooted and the system went into BSOD loop of restarting. Tried everything to stop it. Went to DOS to try to find the file and rename it and it was gone. I called the local tech I use. They said the only way to recover the machine was to reinstall the OpSys, which, of course, wiped my programs and data. Data was triple backed up, no problem. And whatever the tech did then, he left a “Removed apps.html” list on my desktop.
Disadvantage: driver is very old and should be updated. BIOS flashing tool uses amifldrv64.sys (based on MAPMEM).
A couple of things could be going wrong here: your computer’s operating system is updating the BIOS and there are conflicts. A second possibility is that the driver check affects your computer’s driver, causing some BIOS flashing utilities not to work.
There are also other reasons that can cause amifldrv64.sys bluescreen errors, such as crashes and Wi-Fi adapter conflicts.
Fix amifldrv64.sys BSOD error during BIOS update
Updated: April 2024
We highly recommend that you use this tool for your error. Furthermore, this tool detects and removes common computer errors, protects you from loss of files, malware, and hardware failures, and optimizes your device for maximum performance. This software will help you fix your PC problems and prevent others from happening again:
- Step 1 : Install PC Repair & Optimizer Tool (Windows 10, 8, 7, XP, Vista).
- Step 2 : Click Start Scan to find out what issues are causing PC problems.
- Step 3 : Click on Repair All to correct all issues.


Disable Driver Verifier
Microsoft Windows 7, Windows 8.1, and Windows 10 come with a built-in diagnostic tool called Driver Verifier. Essentially, it works by putting incompatible and outdated drivers under tremendous stress in order to cause them to behave badly. It is primarily aimed at verifying native drivers as well as third-party drivers.
For a computer that cannot boot through the recovery menu, follow the first guide.
The Driver Checker Manager can be used to enable or disable driver checking
- You can open Driver Verifier by pressing Windows + R and typing “verifier.exe” in the “Run” dialog box.
Note: When prompted in the UAC (User Account Control) window, click Yes to grant administrator privileges. - Under “Select a task”, select “Delete existing settings” (under “Delete existing settings”).
- Try updating the BIOS once again after disabling Driver Verifier.
- To re-enable the Driver Verifier, follow the steps below if the installation goes smoothly this time.
- The Driver Verifier utility can be opened by pressing the Windows + R key. A text box will appear, where you can enter “verifier.exe” and click Enter.
- You can choose to create custom settings by checking the box under “Select a task” and clicking “Next”.
- Select Default Settings, IRP Log and Forced Pending I/O Requests from the next menu, and then click Next to proceed.
- Next, click Next to get to the next menu and select Select Driver Name from the List.
- Then check all the drivers from Microsoft Corporation that do not appear in the list. Once you have checked the entire list, click Finish and click OK.
- It is necessary to enable the driver scan again after your computer restarts.
Following are the steps for disabling and enabling driver scanning in Windows Restore
- Press any key on your keyboard when prompted to boot from the installation media once you have inserted the installation media compatible with your version of Windows.
- To access the recovery menu, click Repair Computer (at the bottom left of the screen) at the beginning of the Windows installation process.
- Note: You can also force an advanced recovery menu (without the installation media) by forcing 3 consecutive computer shutdowns – rebooting/stopping the computer during the boot process.
- You can select Advanced Options in the troubleshooting sub-item list of the recovery menu.
- The advanced CMD prompt can be accessed by clicking Command Prompt in the Advanced Options menu.
- Enter the password associated with your account after selecting it.
- In order to disable Driver Verifier, enter and press Enter once you have successfully accessed the extended command line:
Reset/verifier. - Restart your computer and follow the instructions from the motherboard manufacturer to update the BIOS. If this works, you are ready to proceed.
- You can re-enable the driver verifier and set it up the same way as before, no matter what the result is.
- Open Driver Verifier by typing “Verifier” into the extended CMD prompt and pressing Enter.
- You will be directed to the next window once you select “Create custom settings” in the Driver Verifier Manager.
- Across the next menu, select Check I/O / Forced Delayed I/O Requests and PIR Logging checkboxes. Ensure all important settings are enabled by clicking Next.
- Select the option Select Driver Names from List on the next screen and click Next to proceed.
- The next screen will allow you to arrange everything alphabetically. Once you do, check all drivers which are not signed by Microsoft Corporation, and click Finish to do this.
- In order for the changes to take effect, you will need to reboot your computer. Click OK and then wait for the reboot to complete.
- BSODs caused by amifldrv64.sys BSODs can be fixed using the alternative method below if the problem persists after disabling the driver check.
Using System Restore
There is a possibility that your computer may not boot properly if this has happened in your scripts since amifldrv64.sys usually is associated with MSI Live Update agent (MSI Live Update agent failures typically result in BSODs, or blue screens of death).
You can recover your computer to the state it was in before attempting the BIOS update by using the System Restore utility. If this fails or you do not have a suitable snapshot of the restore, move on to the next solution.
Remove the MSI Live Update program
MSI Live Update can result in random BSOD crashes if the BSOD crashes point to amifldrv64.sys or NTIOLib_X64.sys files but do not occur during boot.
You’re going to need to check your Wi-Fi adapter for errors if you get the amifldrv64.sys error after updating your BIOS. Users have reported that reinstalling the Wi-Fi adapter through Device Manager fixes the error.
The Live Update program has been uninstalled by several users affected by this problem, preventing BSODs.
A removal of that would prevent automatic BIOS and chipset driver updates, but getting some stability would be better than frequent BSODs.
To uninstall MSI Live Update, follow these steps:
- You can open the “Programs and Features” menu by pressing Windows + R and typing “appwiz.CPL” .
- Look for the MSI Live Update program under the “Programs and Features” menu.
- Using the new popup menu that appears, right-click it and select “Remove” to delete it.
- The frequent BSODs should stop after restarting the computer when the uninstaller finishes uninstalling.
Next, follow the steps below if the problem persists.
Installing the WiFi adapter
In addition to the BIOS driver, the WLAN driver should also be checked if the problem occurs immediately after the BIOS update.
In every case, reinstalling the WiFi adapter driver via Device Manager solved the problem for users who could identify this particular culprit as the culprit in their case.
If your computer starts crashing when amifldrv64.sys or NTIOLib_X64.sys are loaded, try reinstalling the WiFi adapter driver from Device Manager:
- If prompted, open the Device Manager with administrator privileges by pressing Windows + R. Type “devgmt.MSC” in the Run dialog box and click OK when prompted to do so.
- Select Network Adapters from the drop-down menu in Device Manager once you are in it.
- Choose Properties from the new pop-up menu that appears when you right-click on the WiFi driver entry in the list of available subtitles.
- The WiFi driver properties window can be closed by selecting the “Driver” tab, then clicking “Uninstall Device”.
- You will be prompted to confirm the removal again after you click Remove.
- You will need to restart your computer after the process is complete so that the open source WIFI driver can replace the missing one.
- Windows will update the WIFI driver to the latest version once your Internet connection is working again (after a second reboot).
- Check if the BSOD has been resolved after reinstalling your WI-FI driver.
RECOMMENATION: Click here for help with Windows errors.
Frequently Asked Questions
Can a BIOS update resolve BSODs?
In some situations, an outdated BIOS can cause a BSOD error due to certain incompatibilities. So try a BIOS update.
How do I fix the BIOS update error?
- Reset the CMOS.
- Try booting into safe mode.
- Change the BIOS settings.
- Flash the BIOS again.
- Reinstall the system.
- Replace the motherboard.
What is amifldrv64 sys?
sys is a sys file created by MSI (American Megatrends, Inc) for foreigners. The file is usually located in the "c: WindowsTemp" folder and is 13864 bytes (13 KB) in size. However, some Windows users suffer from the blue screen of death associated with amifldrv64.
Does a factory reset fix the blue screen of death?
A Windows PC factory reset will only fix some minor driver issues. Resetting your PC will not fix a serious problem, such as outdated drivers. Also, if the cause of BSOD is hardware-related, rebooting your PC will not help.

Mark Ginter is a tech blogger with a passion for all things gadgets and gizmos. A self-proclaimed "geek", Mark has been blogging about technology for over 15 years. His blog, techquack.com, covers a wide range of topics including new product releases, industry news, and tips and tricks for getting the most out of your devices. If you're looking for someone who can keep you up-to-date with all the latest tech news and developments, then be sure to follow him over at Microsoft.